Requirements
- An AWS account
- An activated Flowroute account
- A Flowroute phone number (for associating the inbound route with)
Set Up Amazon Route 53
To start using Amazon Route 53, check out Setting Up Amazon Route 53. Once you have met the prerequisites of registering / transferring your domain and creating a hosted zone for that domain, you are then ready to set up an SRV record. Please note that this tutorial does not cover the difference between public and private hosted zones.
Create your SRV Record
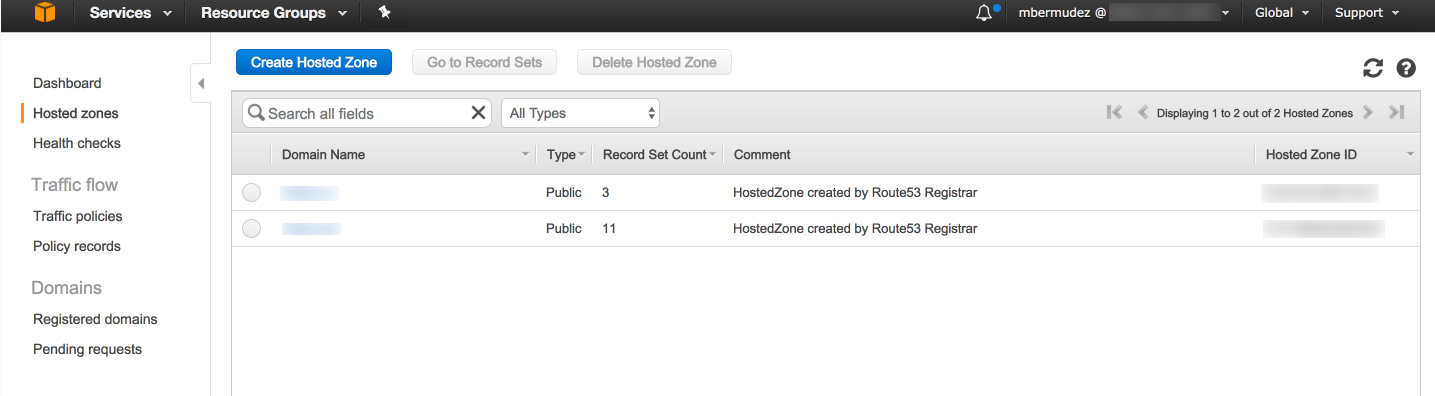
Sign in to the AWS Management Console and open the Amazon Route 53 console. Click “Hosted Zones” in the left navigation pane.
Select your Hosted Zone. Note that you have to click the Domain Name itself and not the radio button.
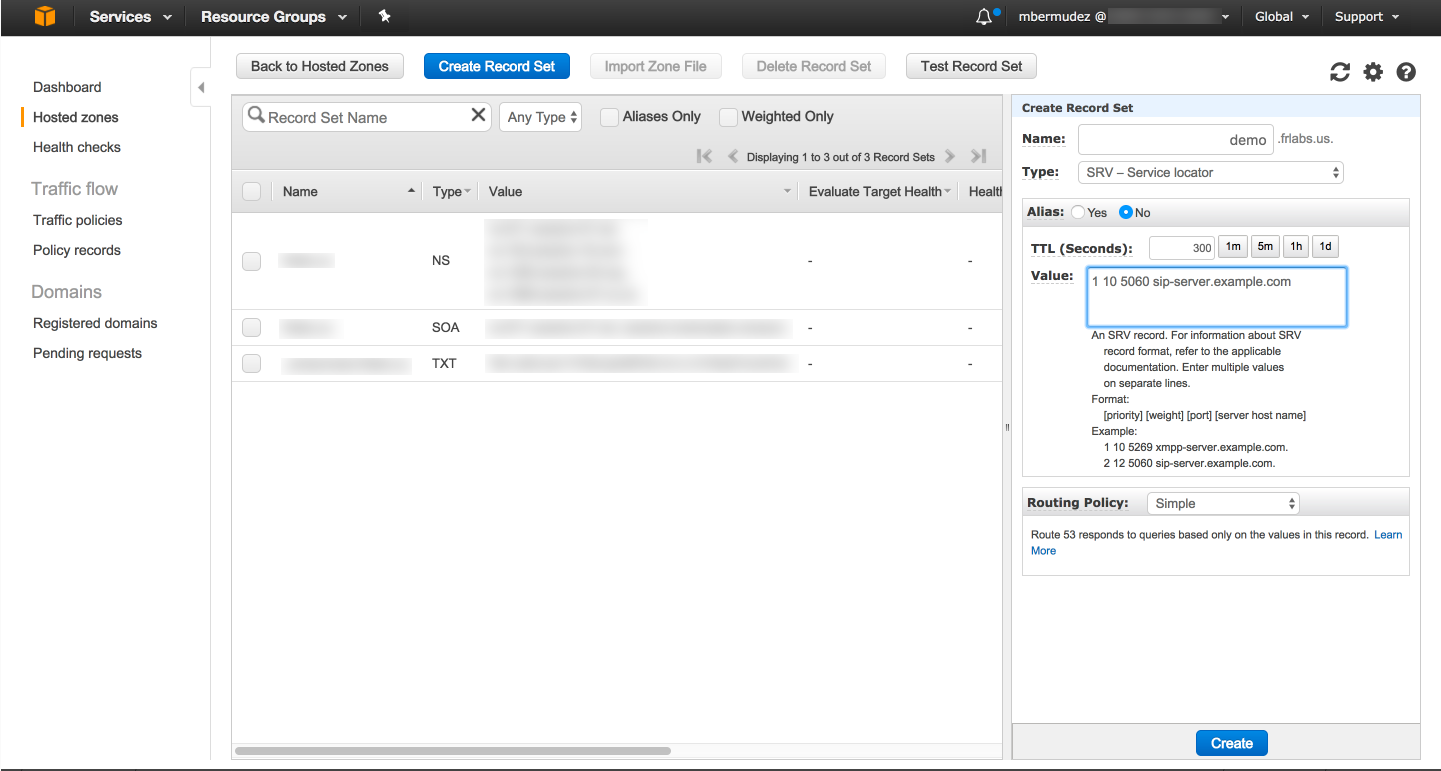
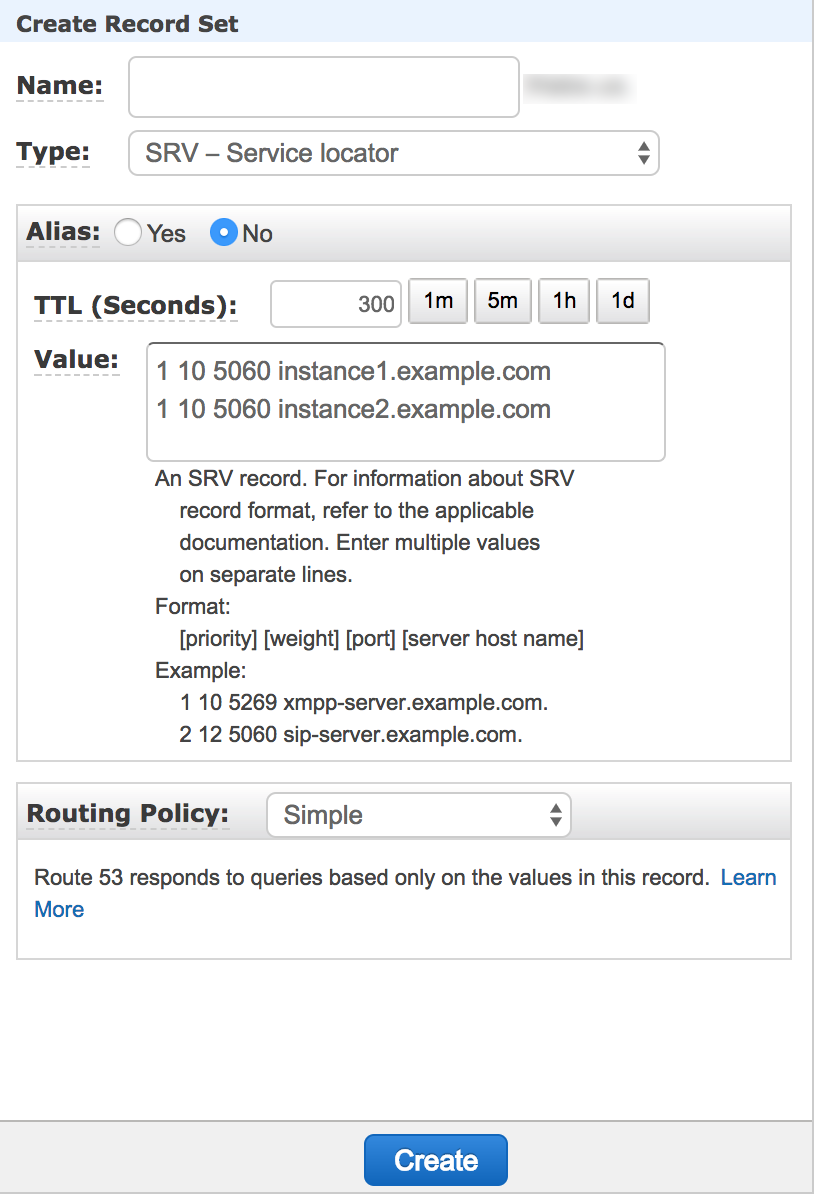
In the Resource Records Set page, click Create Record.
Follow the instructions detailed in Values for Basic Resource Record Sets and make sure to specify SRV — Service locator for the Type.
 https://support.flowroute.com/customer/portal/articles/2644922-change-freepbx-13-to-use-alternate-sip-port-5160-
Configure your Flowroute Account
Flowroute phone numbers route via SIP Registration by default. To register your SRV record as an inbound route, do the following:
Log into your Manage account and select the Inbound Routes tab of the Interconnection page. Enter the value of your newly created SRV record.
Select Host as your Route Type and click Add Route. To assign your newly created inbound route, please visit Statically route your phone number to a host system for inbound calls.
The advantage of setting up an SRV (Service Locator) record instead of an A record is that you can point the record to multiple instances (and Flowroute will load balance over them). You can also use an alternate port for routing traffic as covered here and here. Flowroute's support site has additional configuration guides that cover setting up an alternate port for SIP signaling. Please note that for load balancing via SRV record, you need one SRV record of the same priority, though not necessarily weight, for each EC2 instance.
Additional Configuration
Routing Traffic to an Amazon EC2 Instance
If your website or web application is hosted on an EC2 instance, you can also route traffic for your domain to your server via Route 53. Please read Routing Traffic to an Amazon EC2 Instance to get it set up. The Prerequisites section outlines how to get started with Amazon EC2 instances depending on your OS.
Configuring Servers on Different Availability Zones with SRV Load Balancing
To understand AWS regions and availability zones, check out the official documentation here. By launching your instances in separate Availability Zones, you can protect your applications from the failure of a single location. To configure your servers or instances that are in multiple availability zones and enable SRV load balancing for them, do the following:
Launch your instance in AZ (Availability Zone) #1. Specifying the availability zone is dependent on your account platform. If you are using EC2-Classic, the zones should be configurable using the Availability Zone dropdown. If you are on EC2-VPC, you can select any of your existing subnets or create a new one.
Launch your instance in AZ (Availability Zone) #2.
Create an SRV record pointing to EC2 instance #1. Following the instructions above, create an SRV record set that points to your first instance.
Repeat #3 for your second instance.
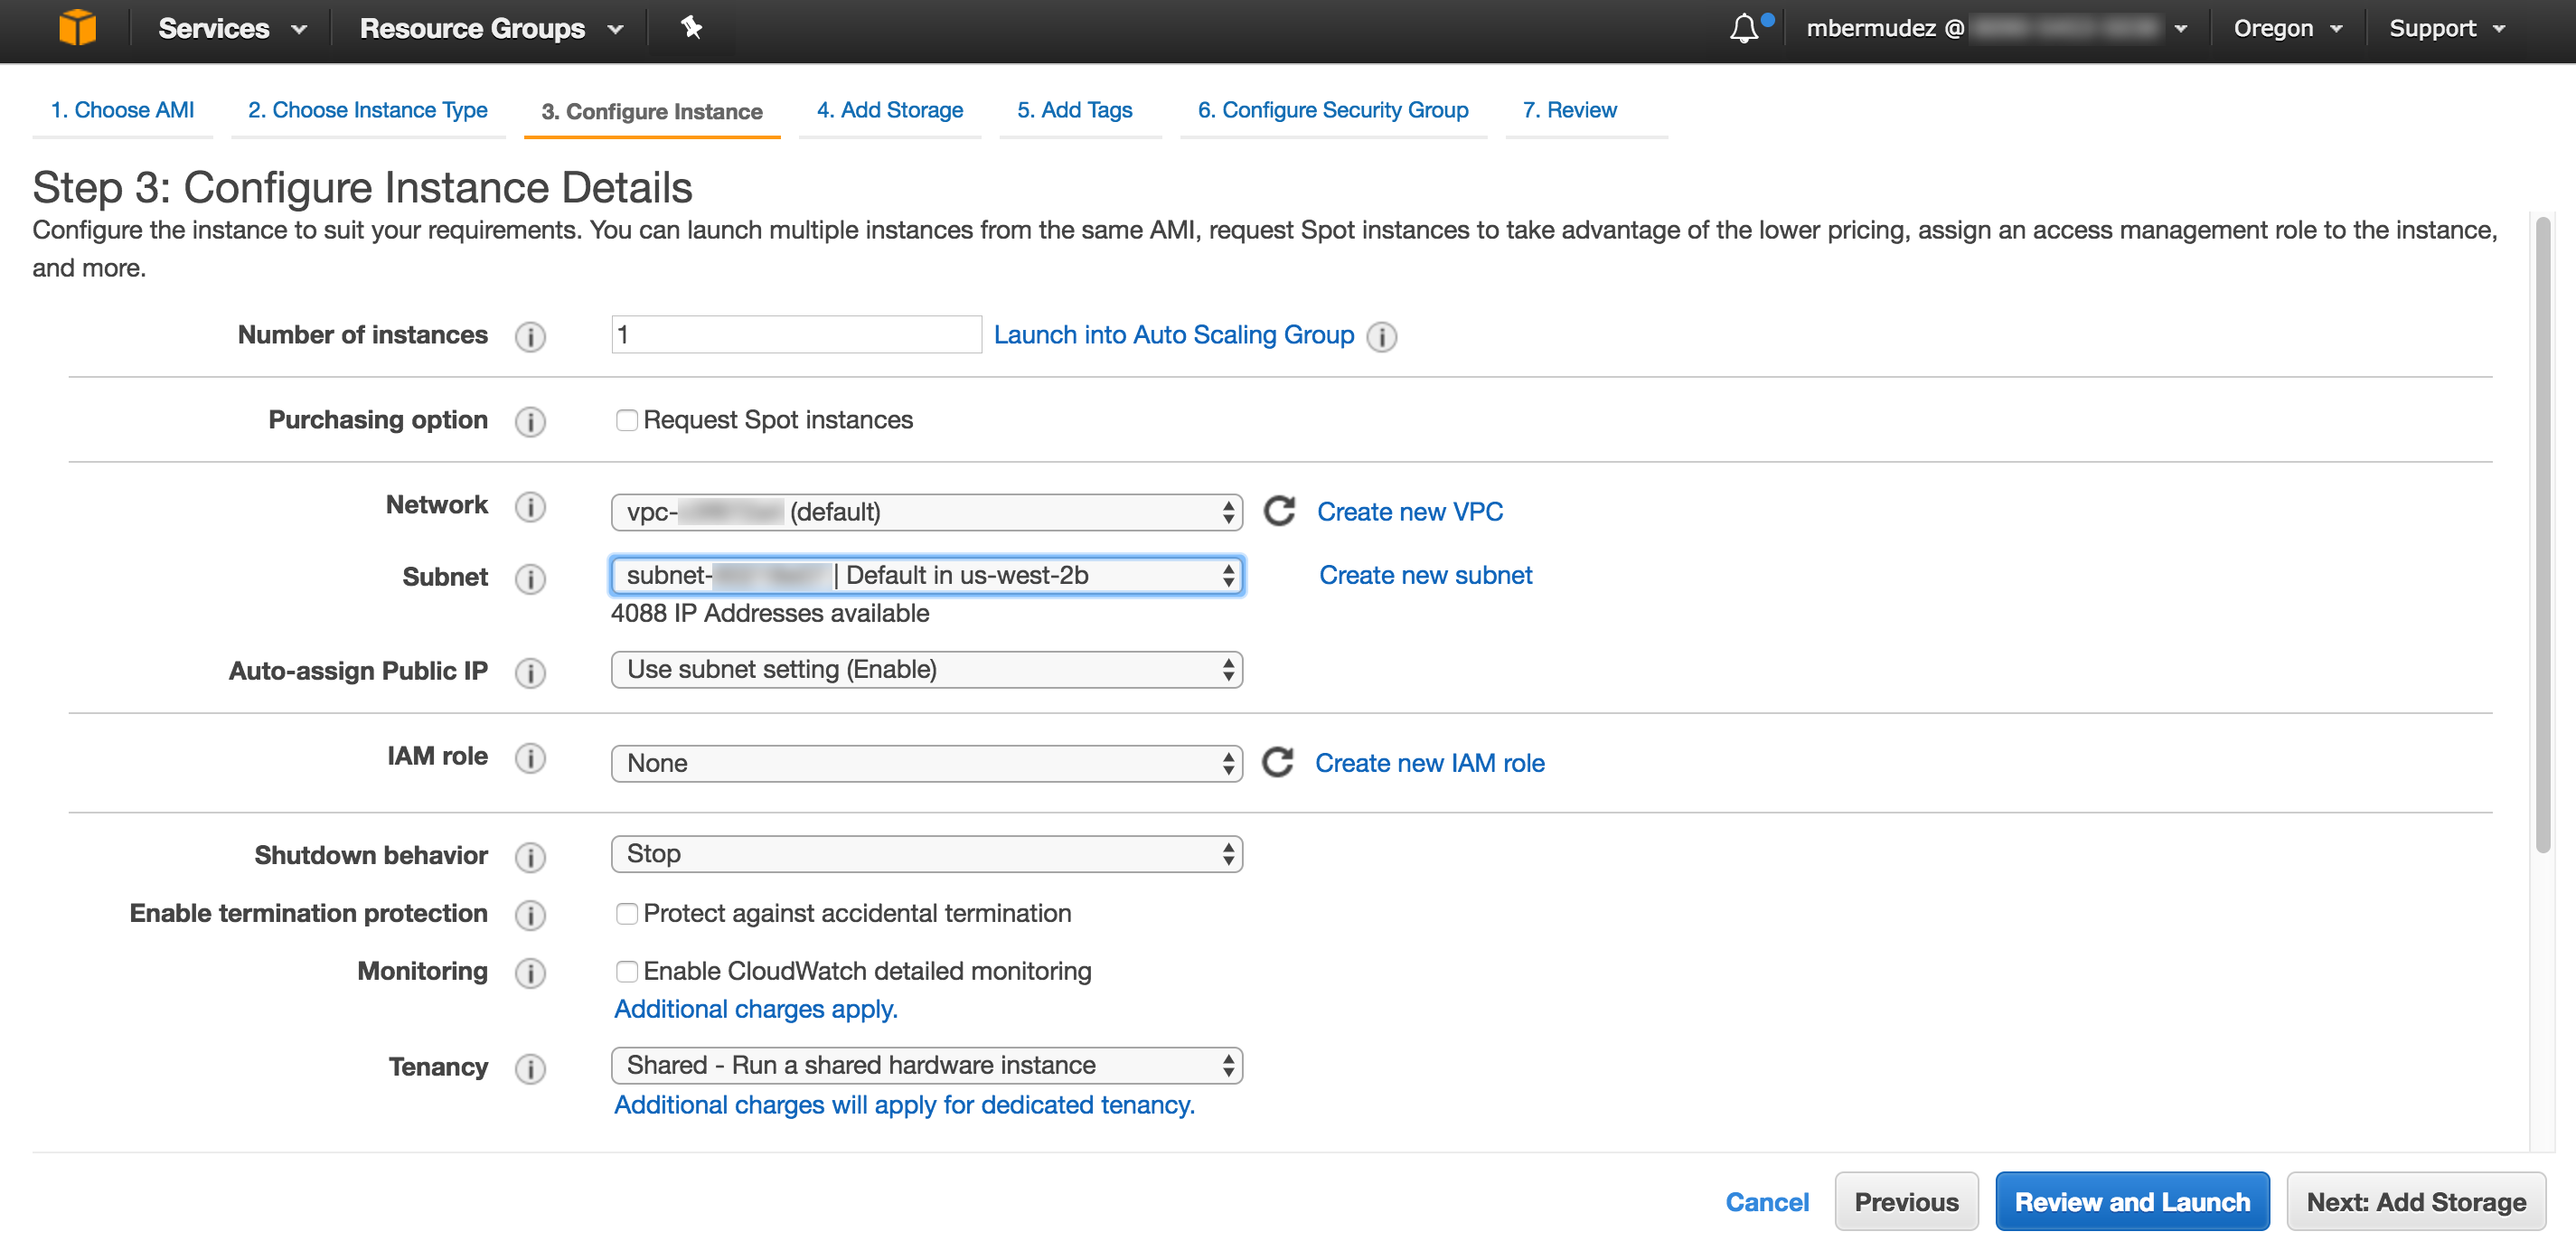
In the above example, we have selected us-west-2b for our Availability Zone.
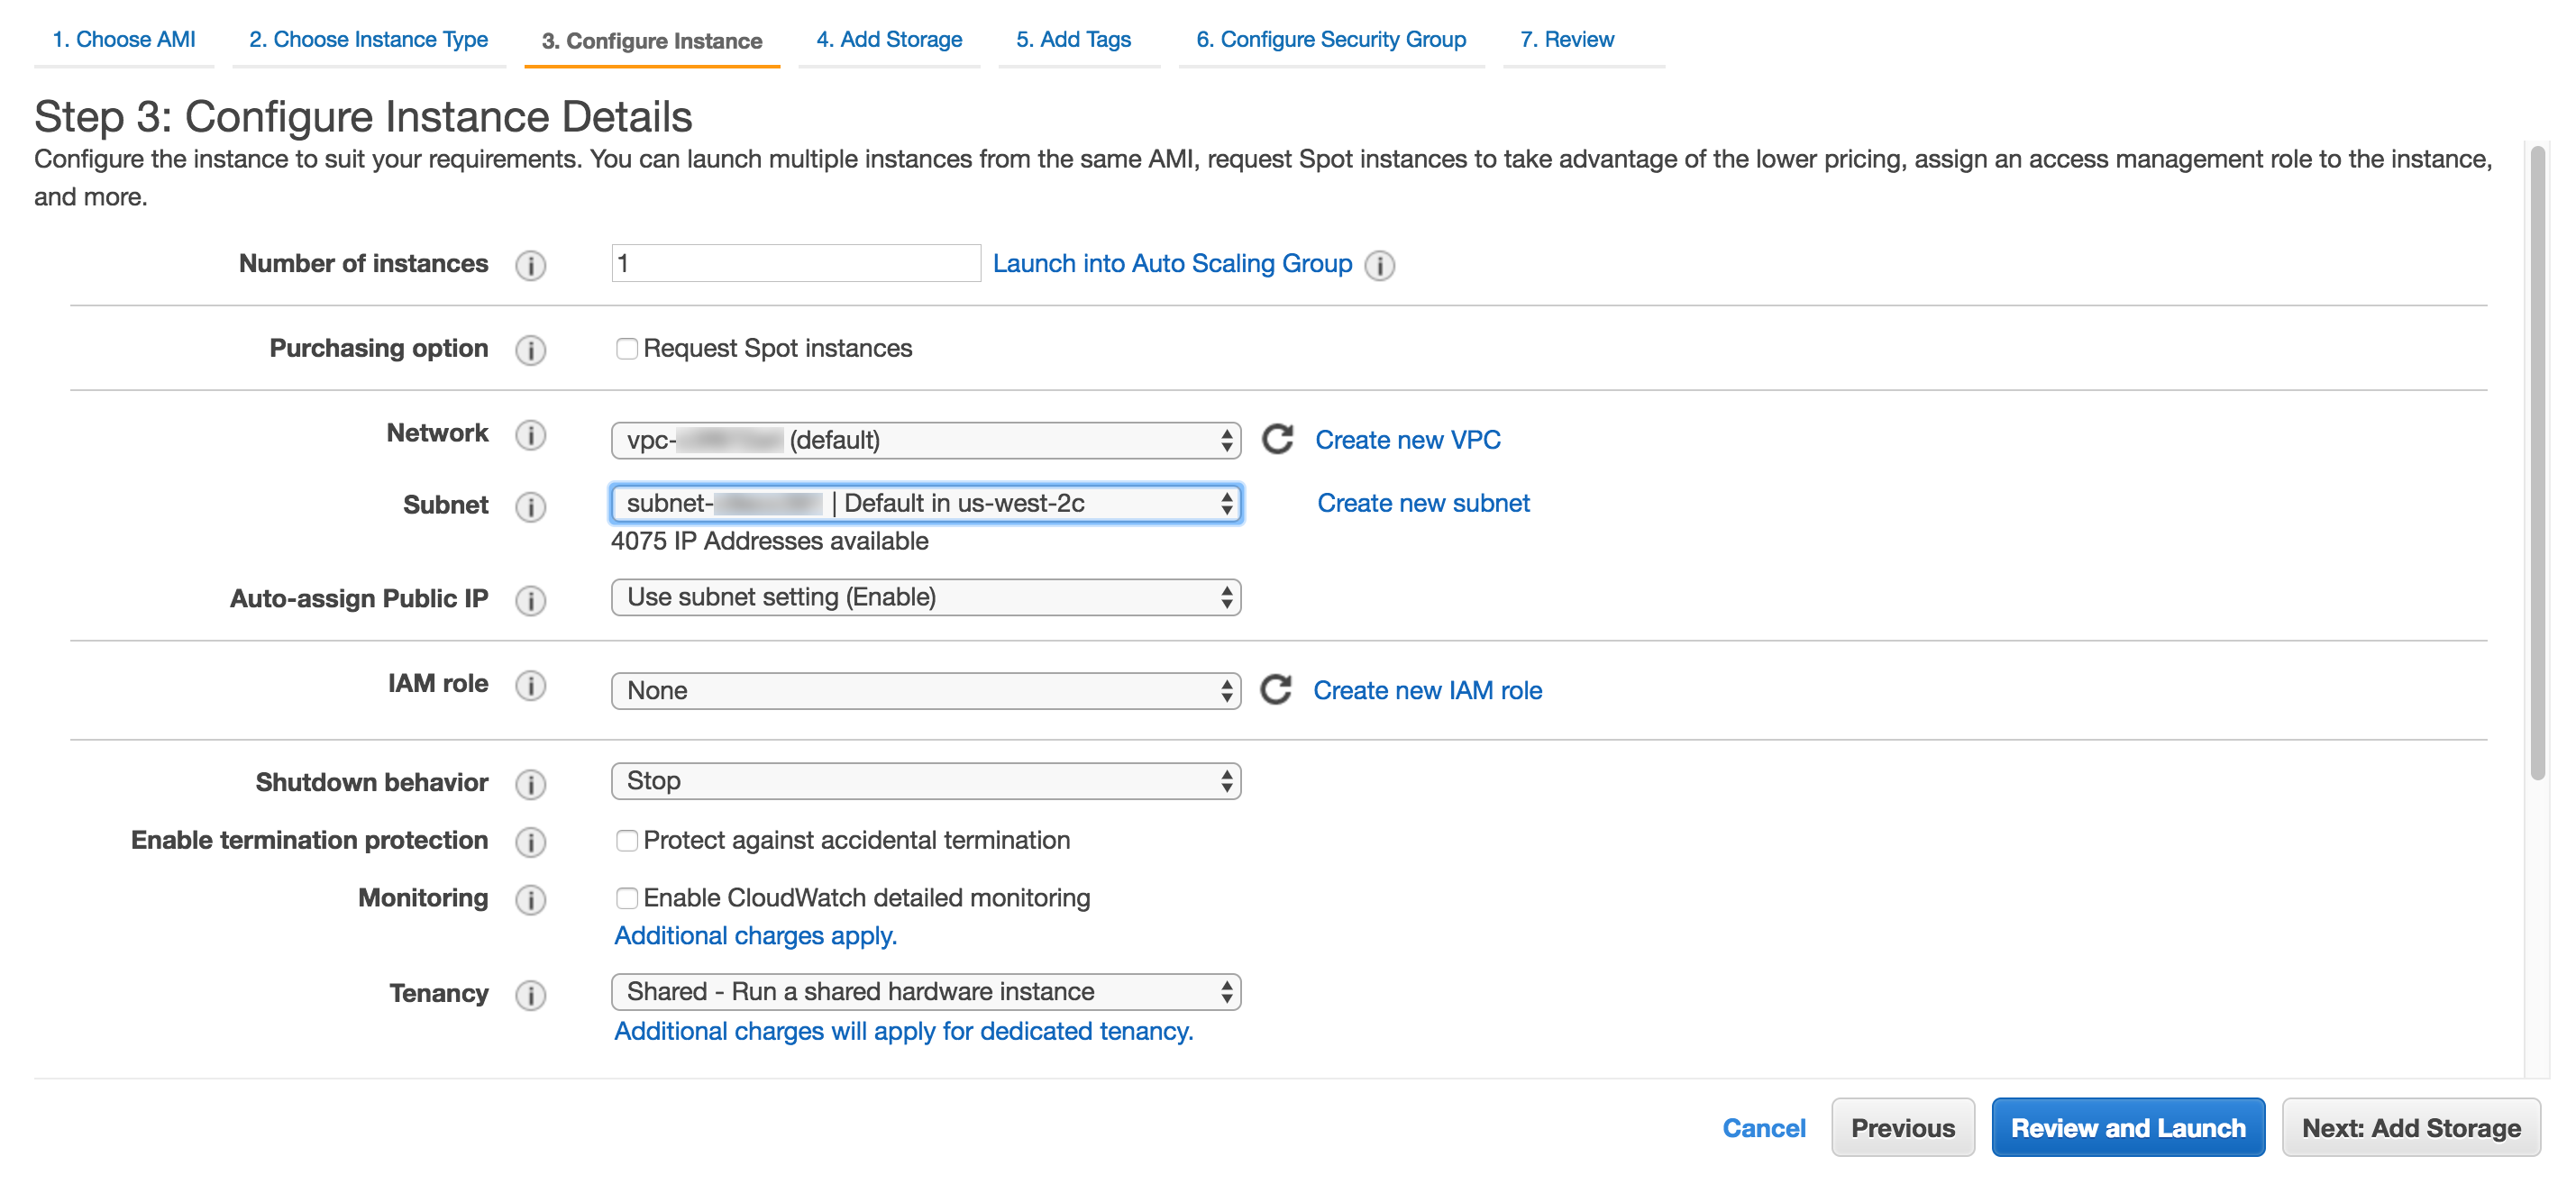
Our second instance is defaulted to us-west-2c.
Now the traffic will be balanced across each of the instances that you have configured in separate availability zones. Please reference RFC 2782 for additional information on SRV records.