Text messaging has become such an integral part of our daily lives. Flowroute outlines some of the potential use cases for SMS here. In this tutorial, we will outline the steps of configuring Flowroute with Microsoft Flow in order to start receiving SMS and MMS on your Microsoft 365 email. Microsoft Flow is a service for creating automated workflows between your favorite apps — Microsoft 365 in this case — and services (i.e., the Flowroute Messaging API) in order to get notifications, synchronize files, collect data, and more.
Requirements
- An activated Flowroute account with at least one long code or toll-free number provisioned for SMS and/or MMS
- A Microsoft 365 email account
Steps
- Sign up for Microsoft Flow
- Create your flow for Flowroute
- Click Create from blank
- Click Search hundreds of connectors and triggers
- Specify your connector and trigger
- Search for "request" and select the Request — When a HTTP request is received trigger
- Click Use sample payload to generate schema
- Paste a sample JSON payload from Flowroute
- Connect your Flowroute JSON trigger with your Microsoft 365 email
- Name and save your flow
- Update your Flowroute API preferences
- PowerShell function to address API authentication issues
Sign up for Microsoft Flow
To get started, follow Sign up and sign in for Microsoft Flow and Get started with Microsoft Flow.
Create your flow for Flowroute
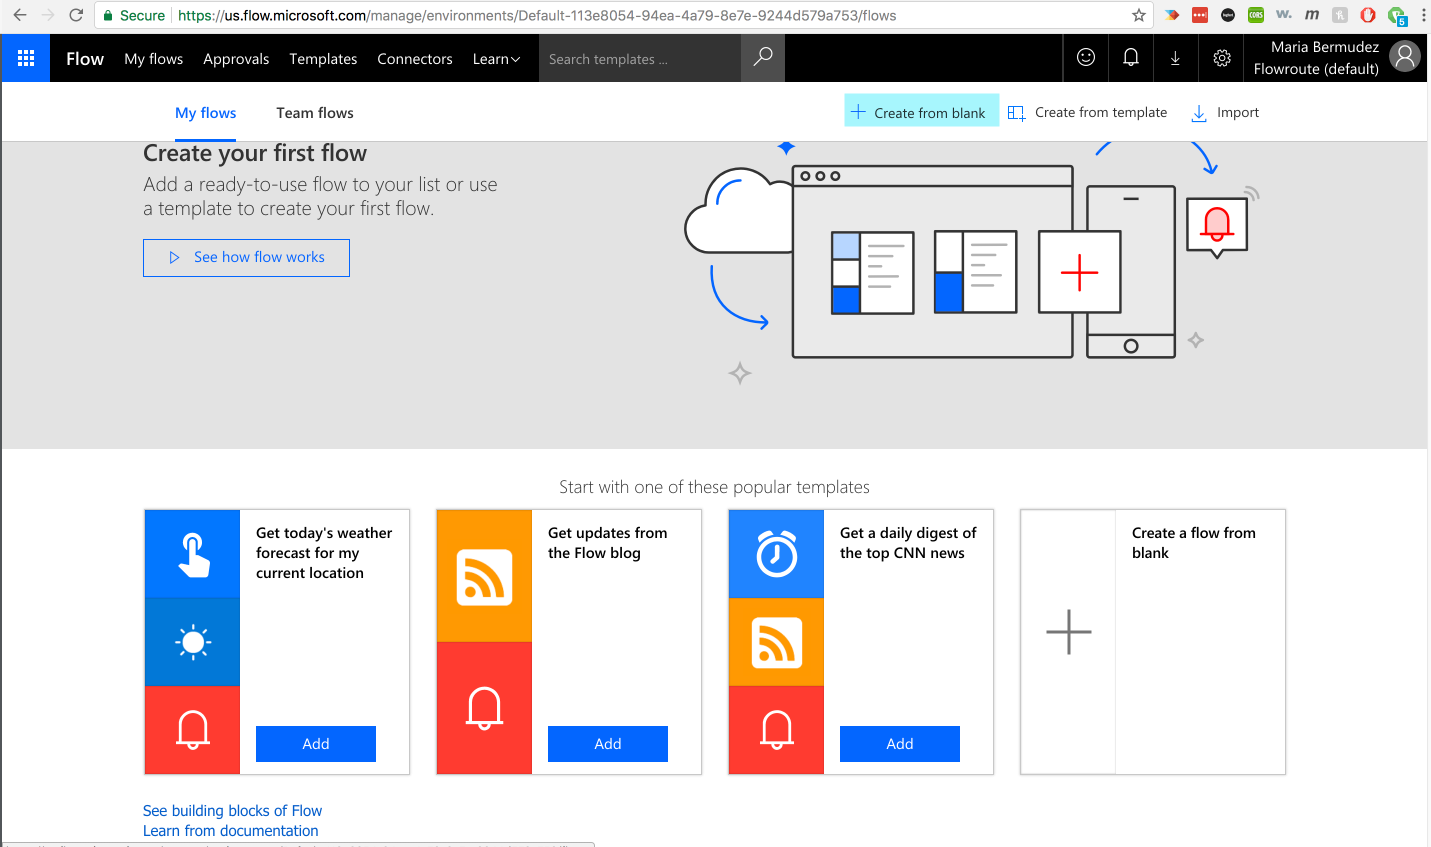
Once you're signed in at Microsoft Flow, select My Flows on the upper left corner of the screen.
1. Click + Create from blank on the upper right corner of the Flows page.
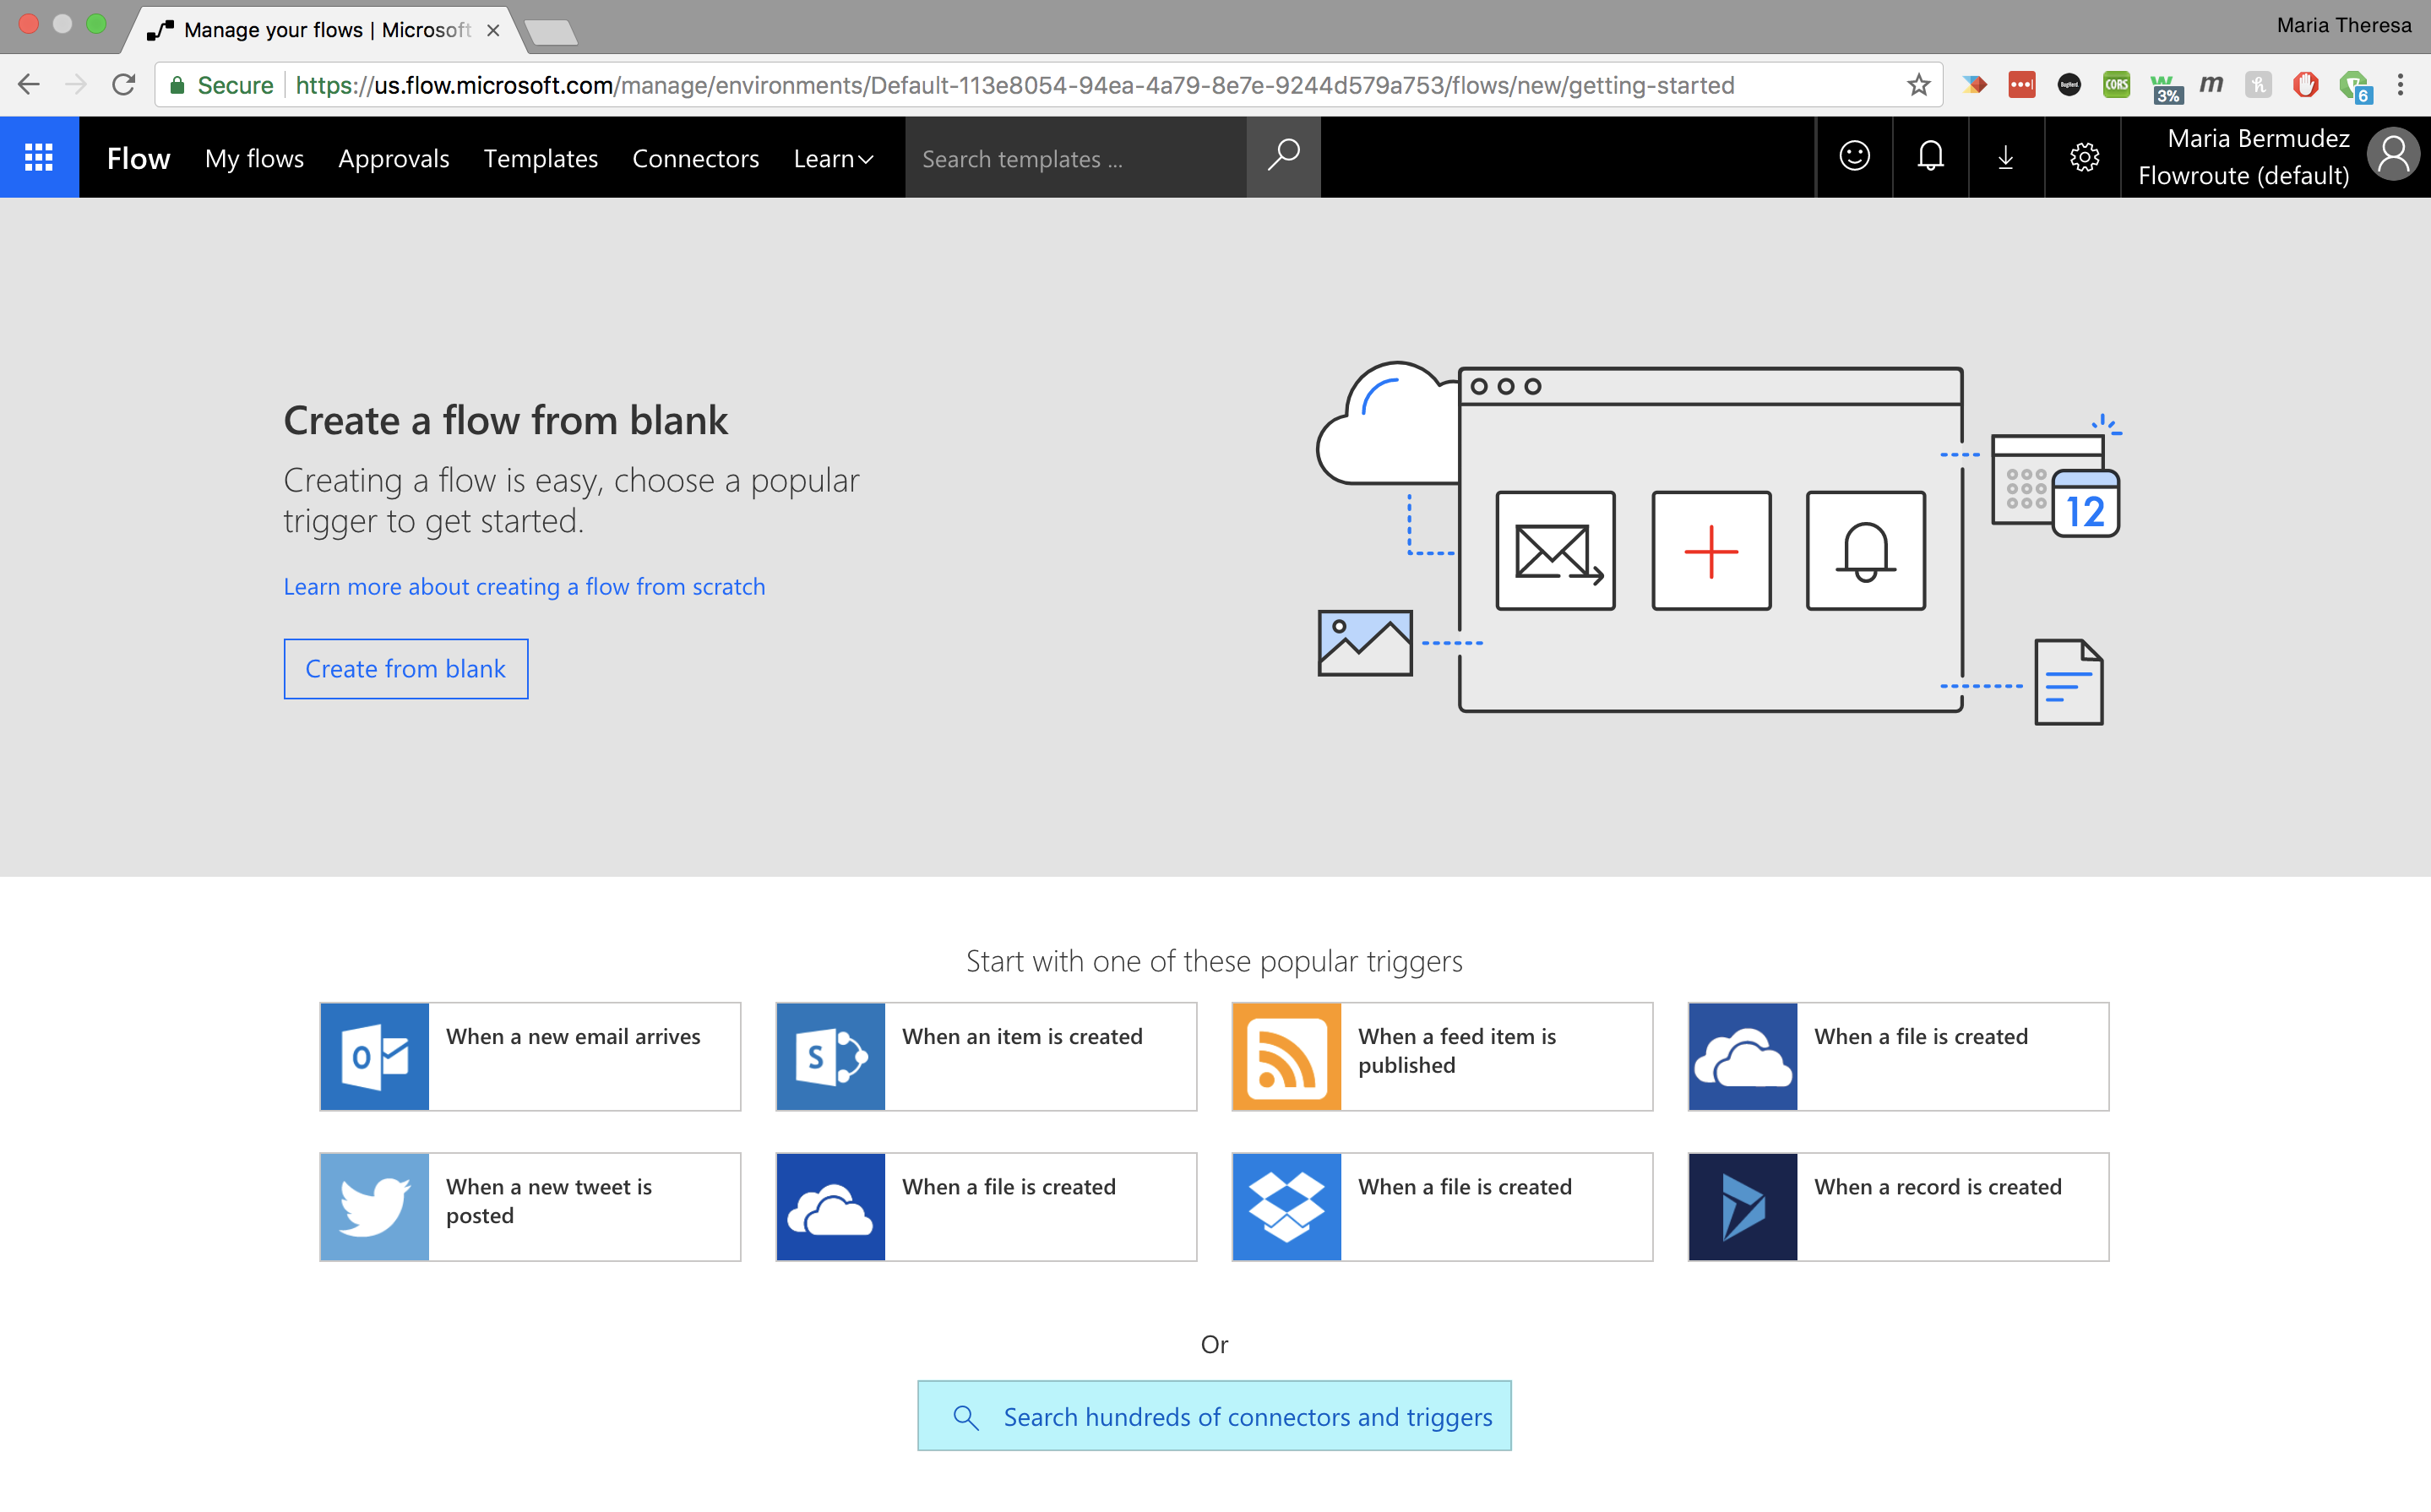
2. Click Search hundreds of connectors and triggers on the bottom corner of the New Flow creation page.
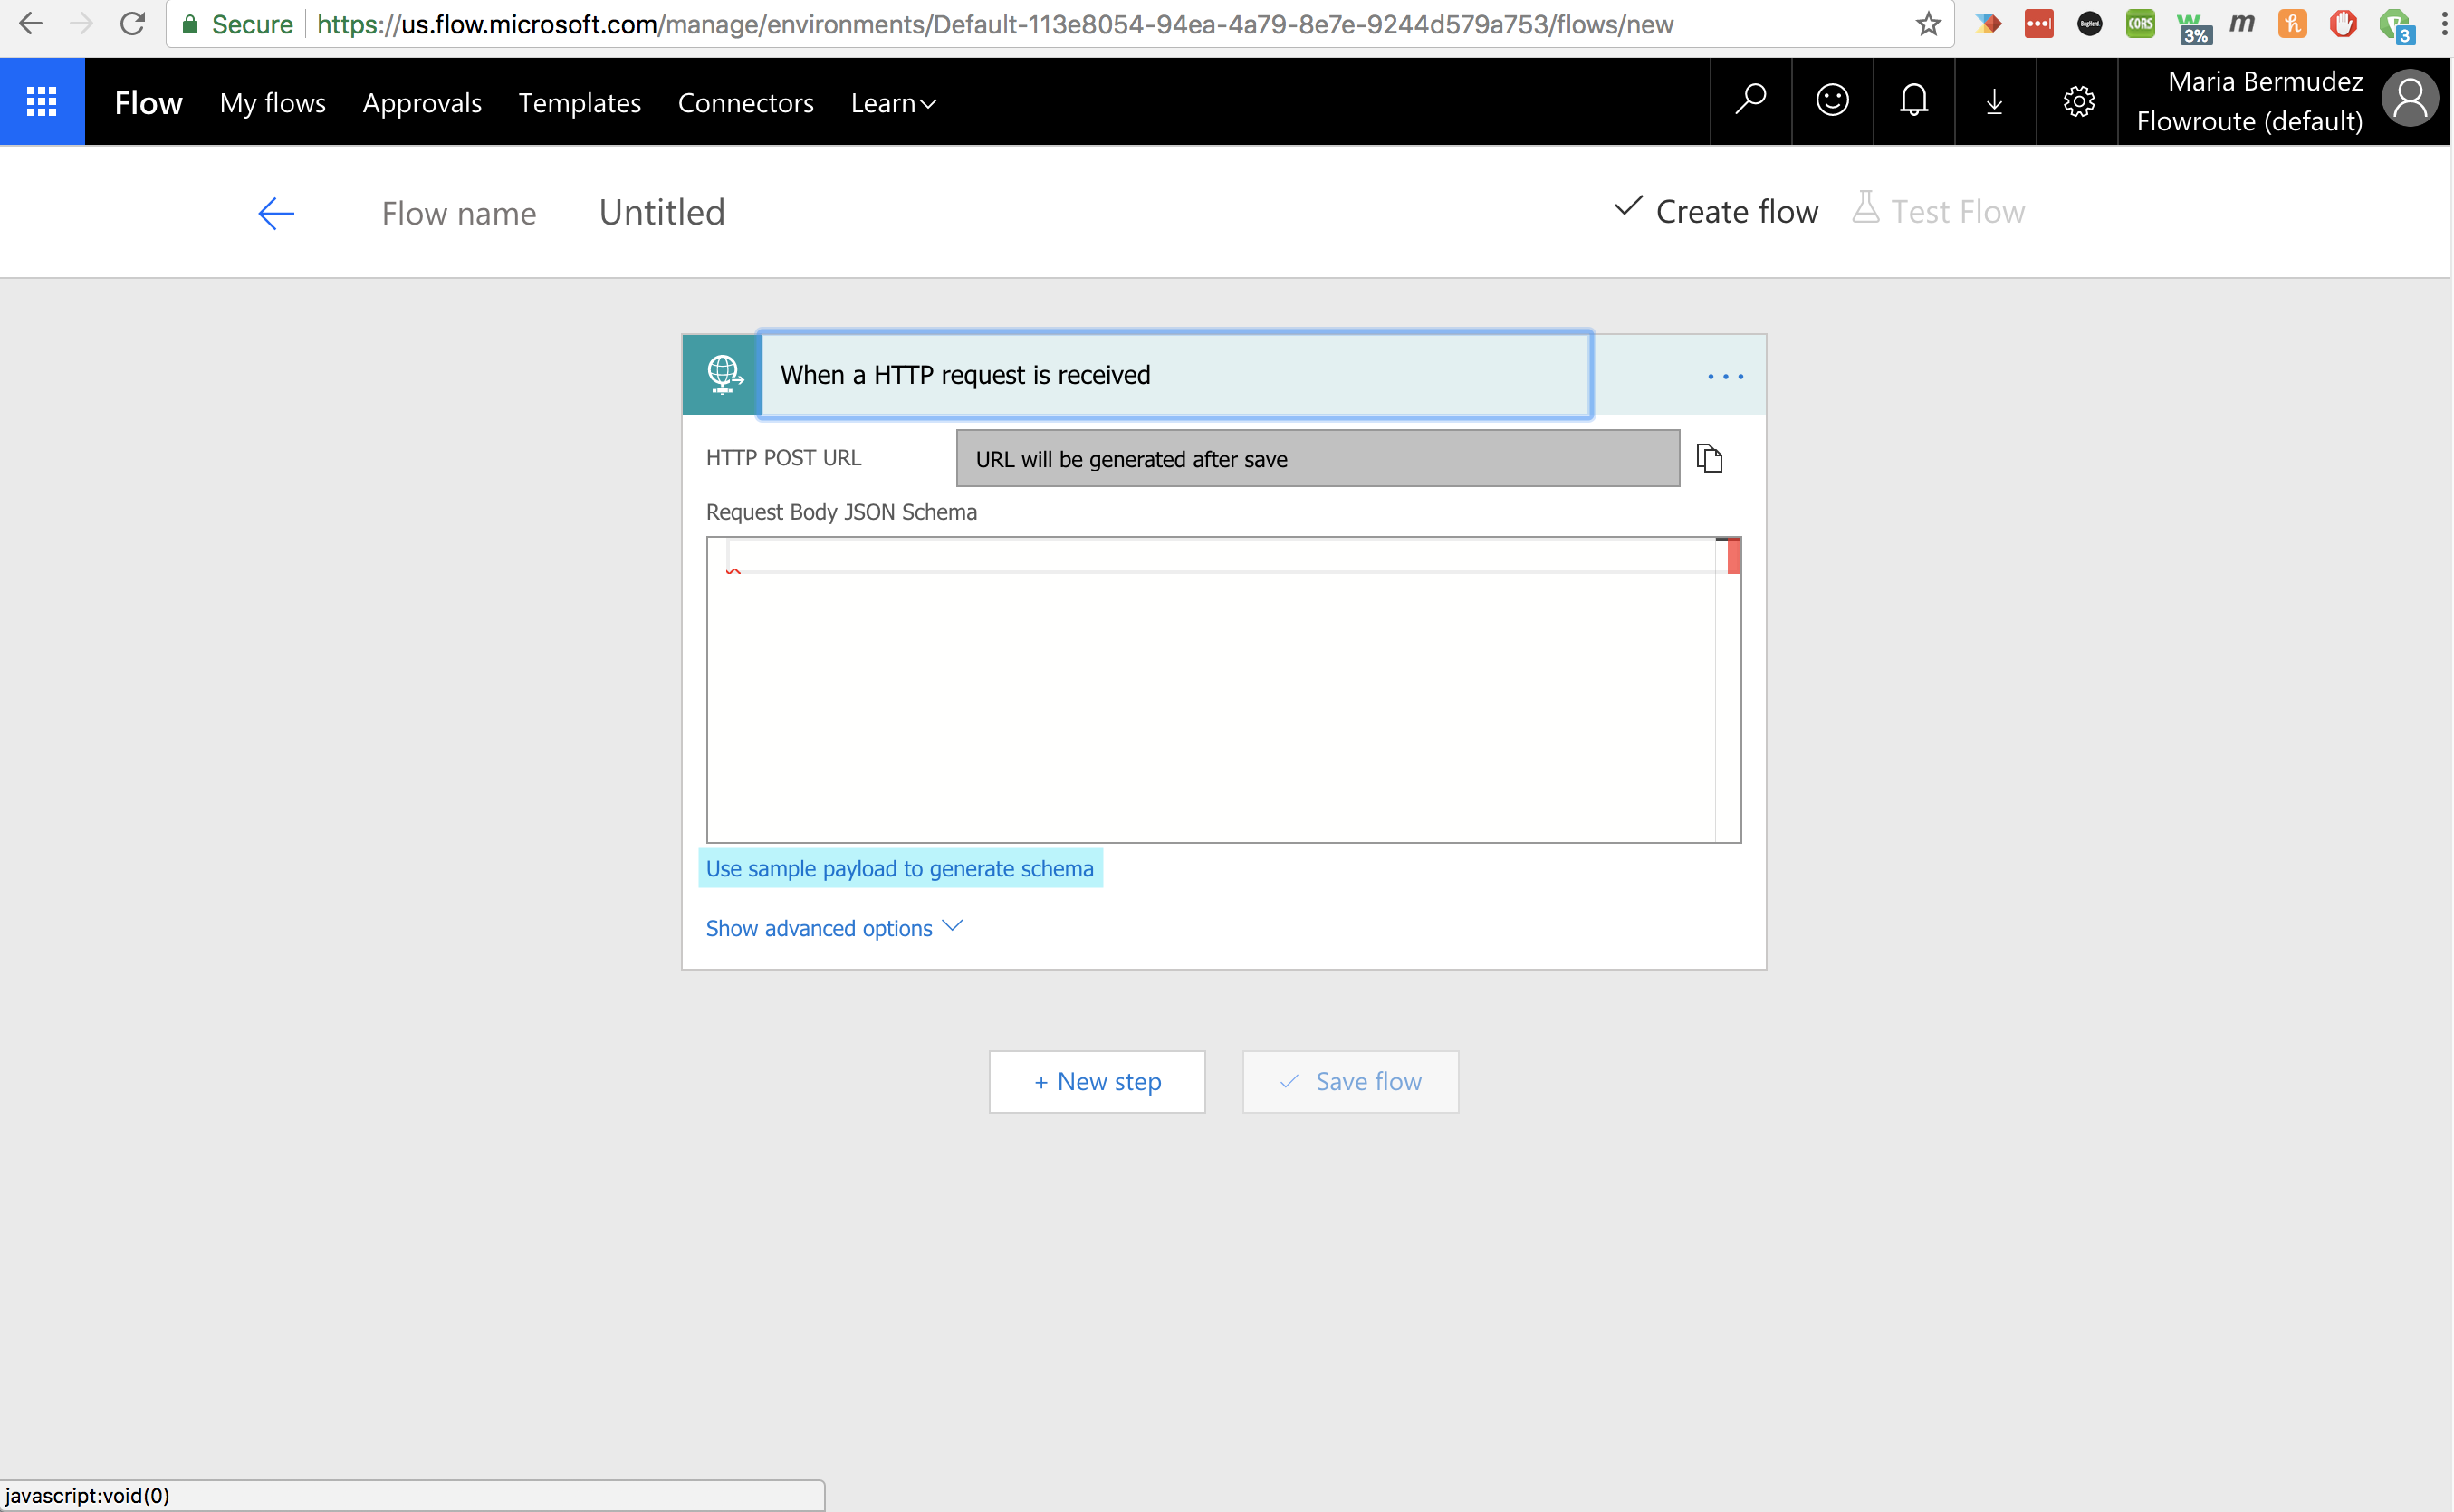
3. Specify your connector and trigger.
a. Search for "request" and select Request — When a HTTP request is received.

b. Click Use sample payload to generate schema.
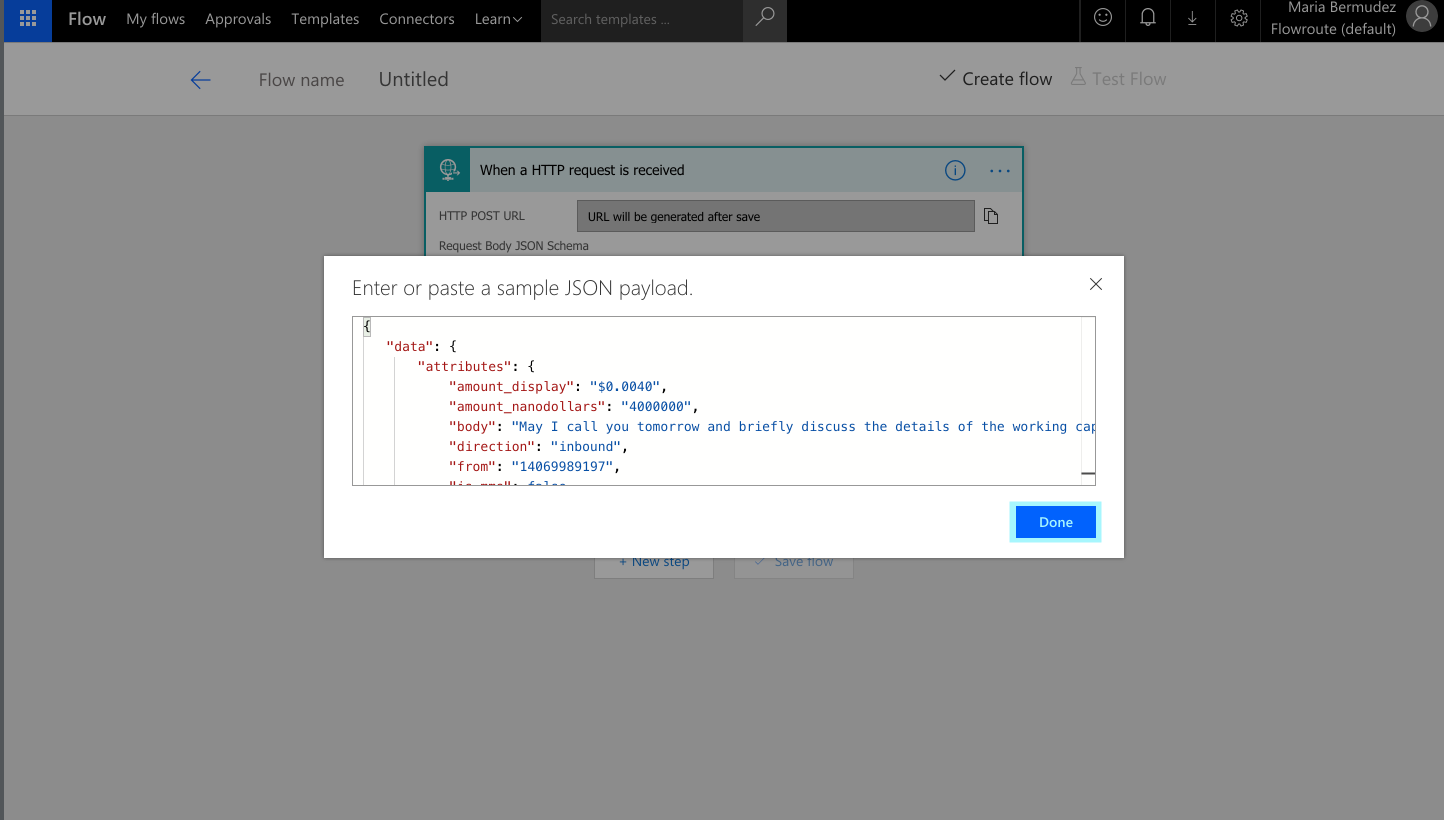
c. Copy and paste the sample JSON payload from Receive Inbound SMS and click Done.
4. Connect your Flowroute JSON trigger with your Microsoft 365 email.
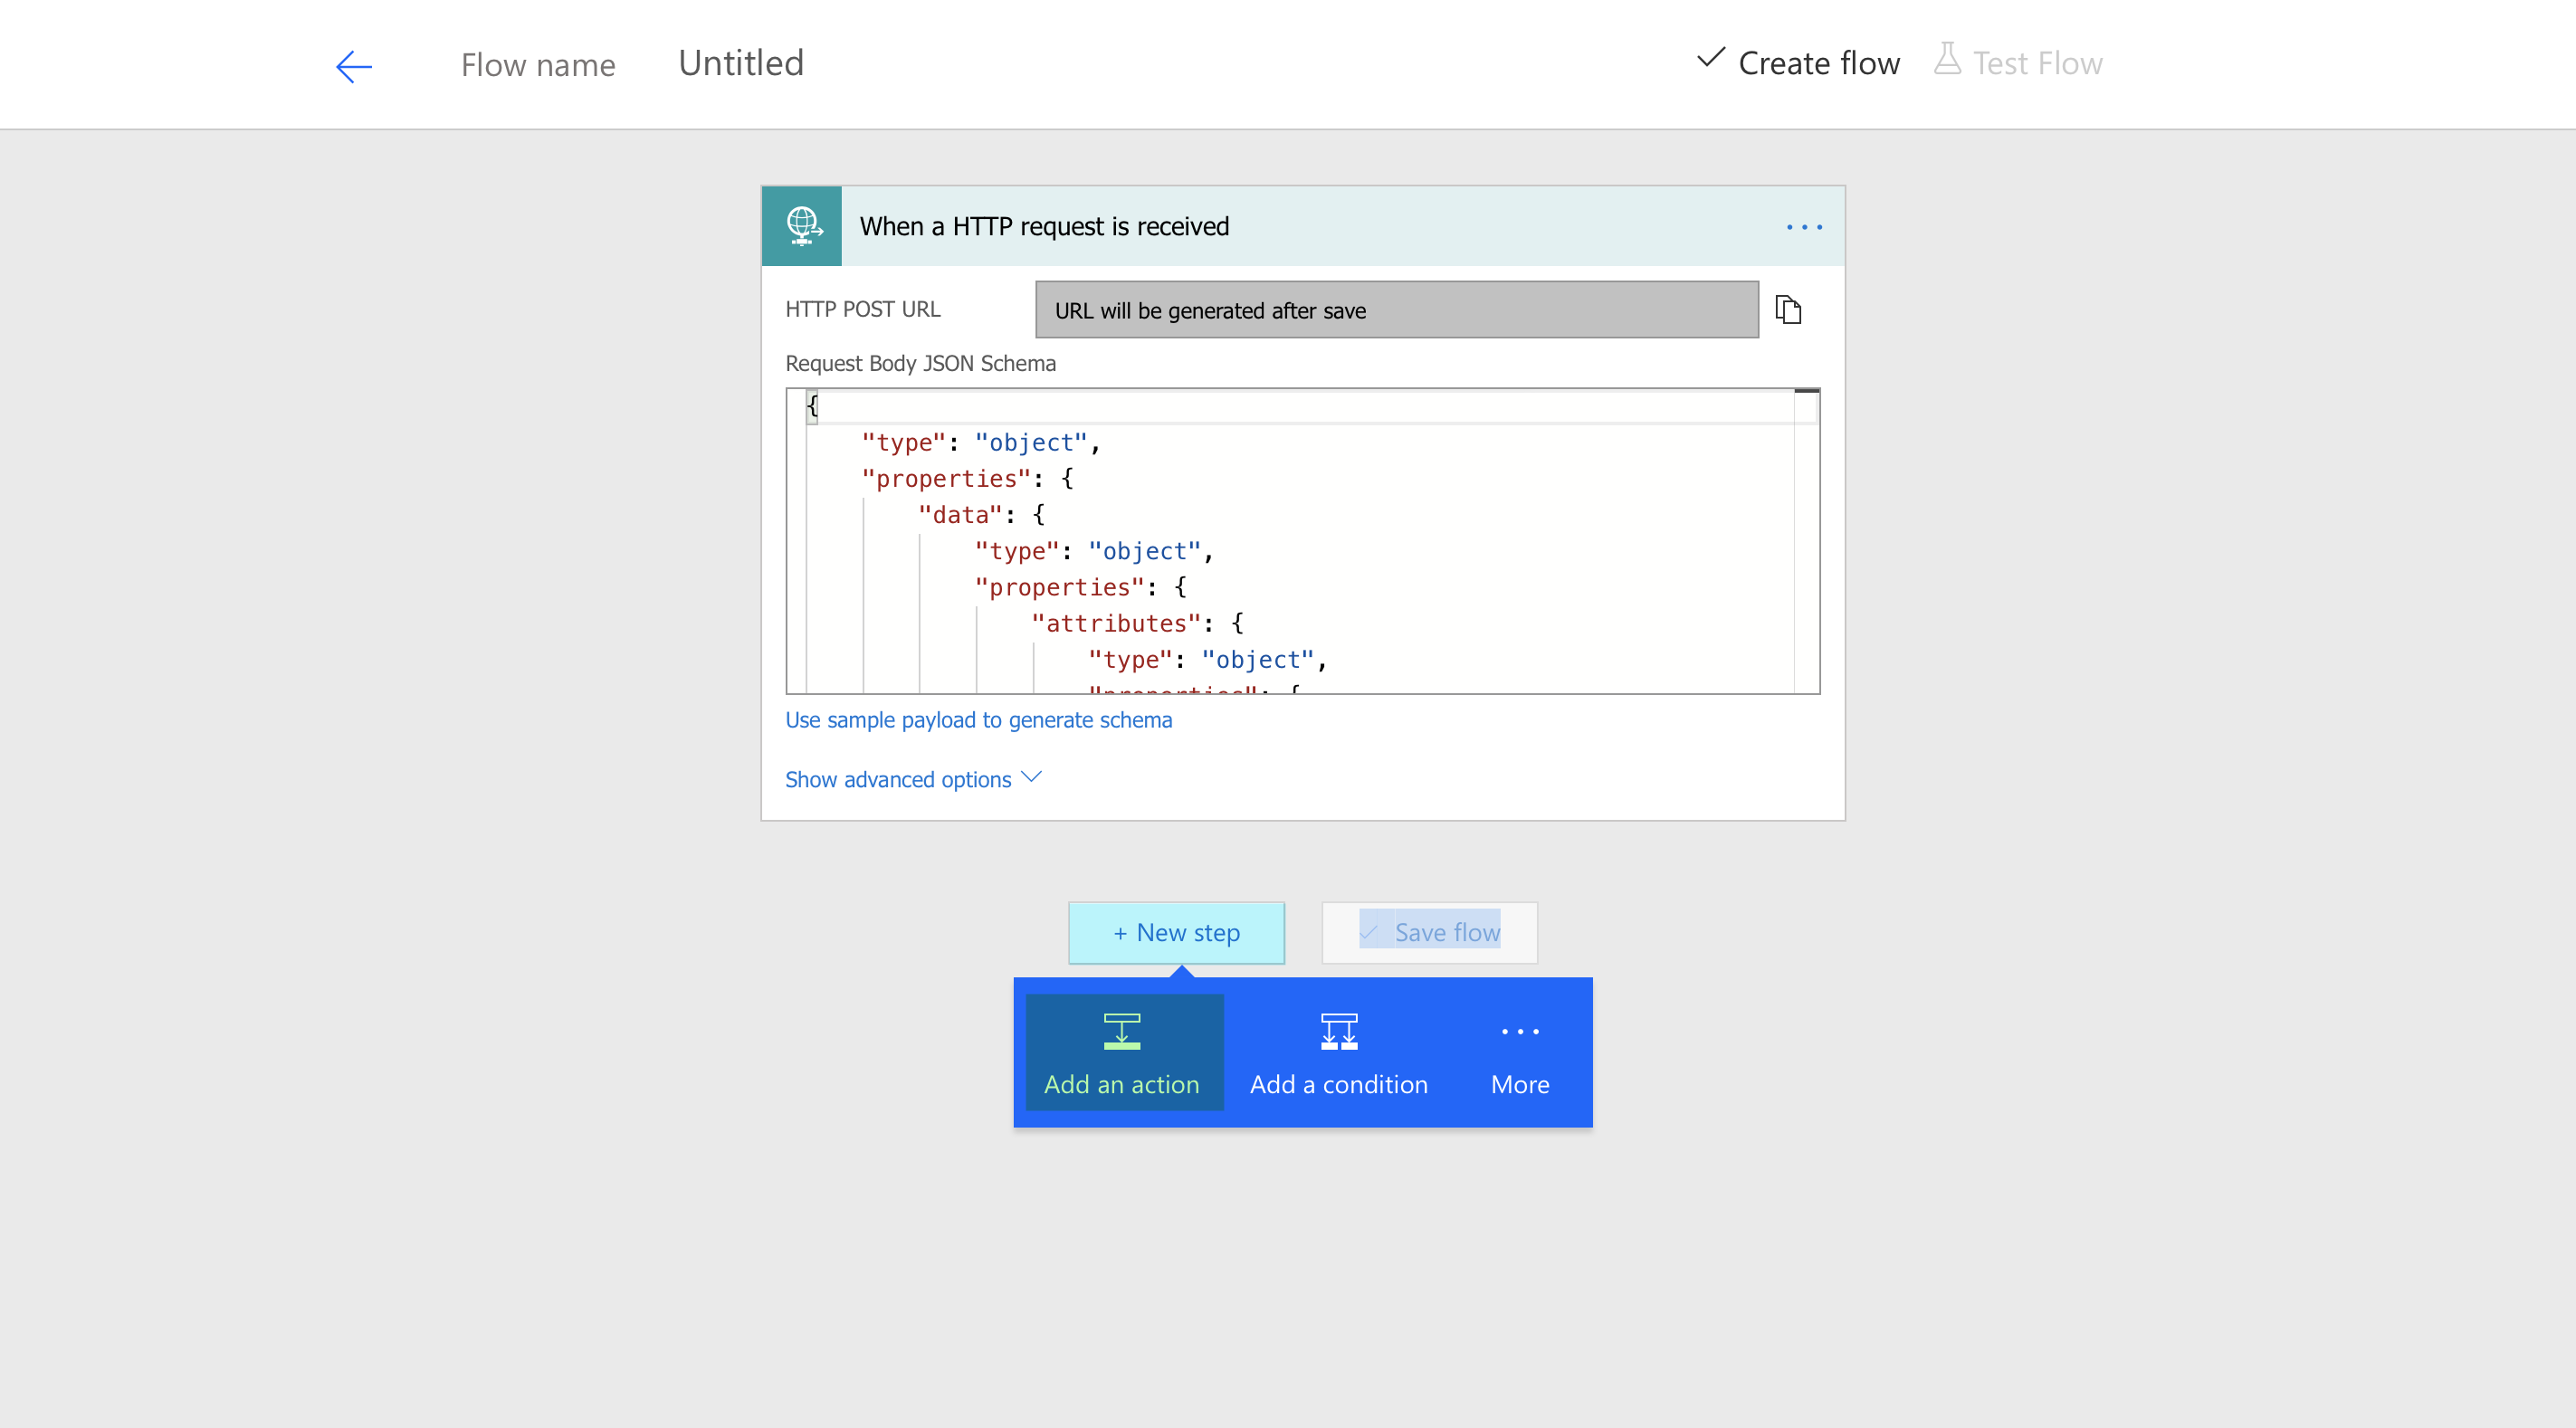
a. Click New Step > Add an action to enable sending of an email when you receive an inbound message on your Flowroute account.
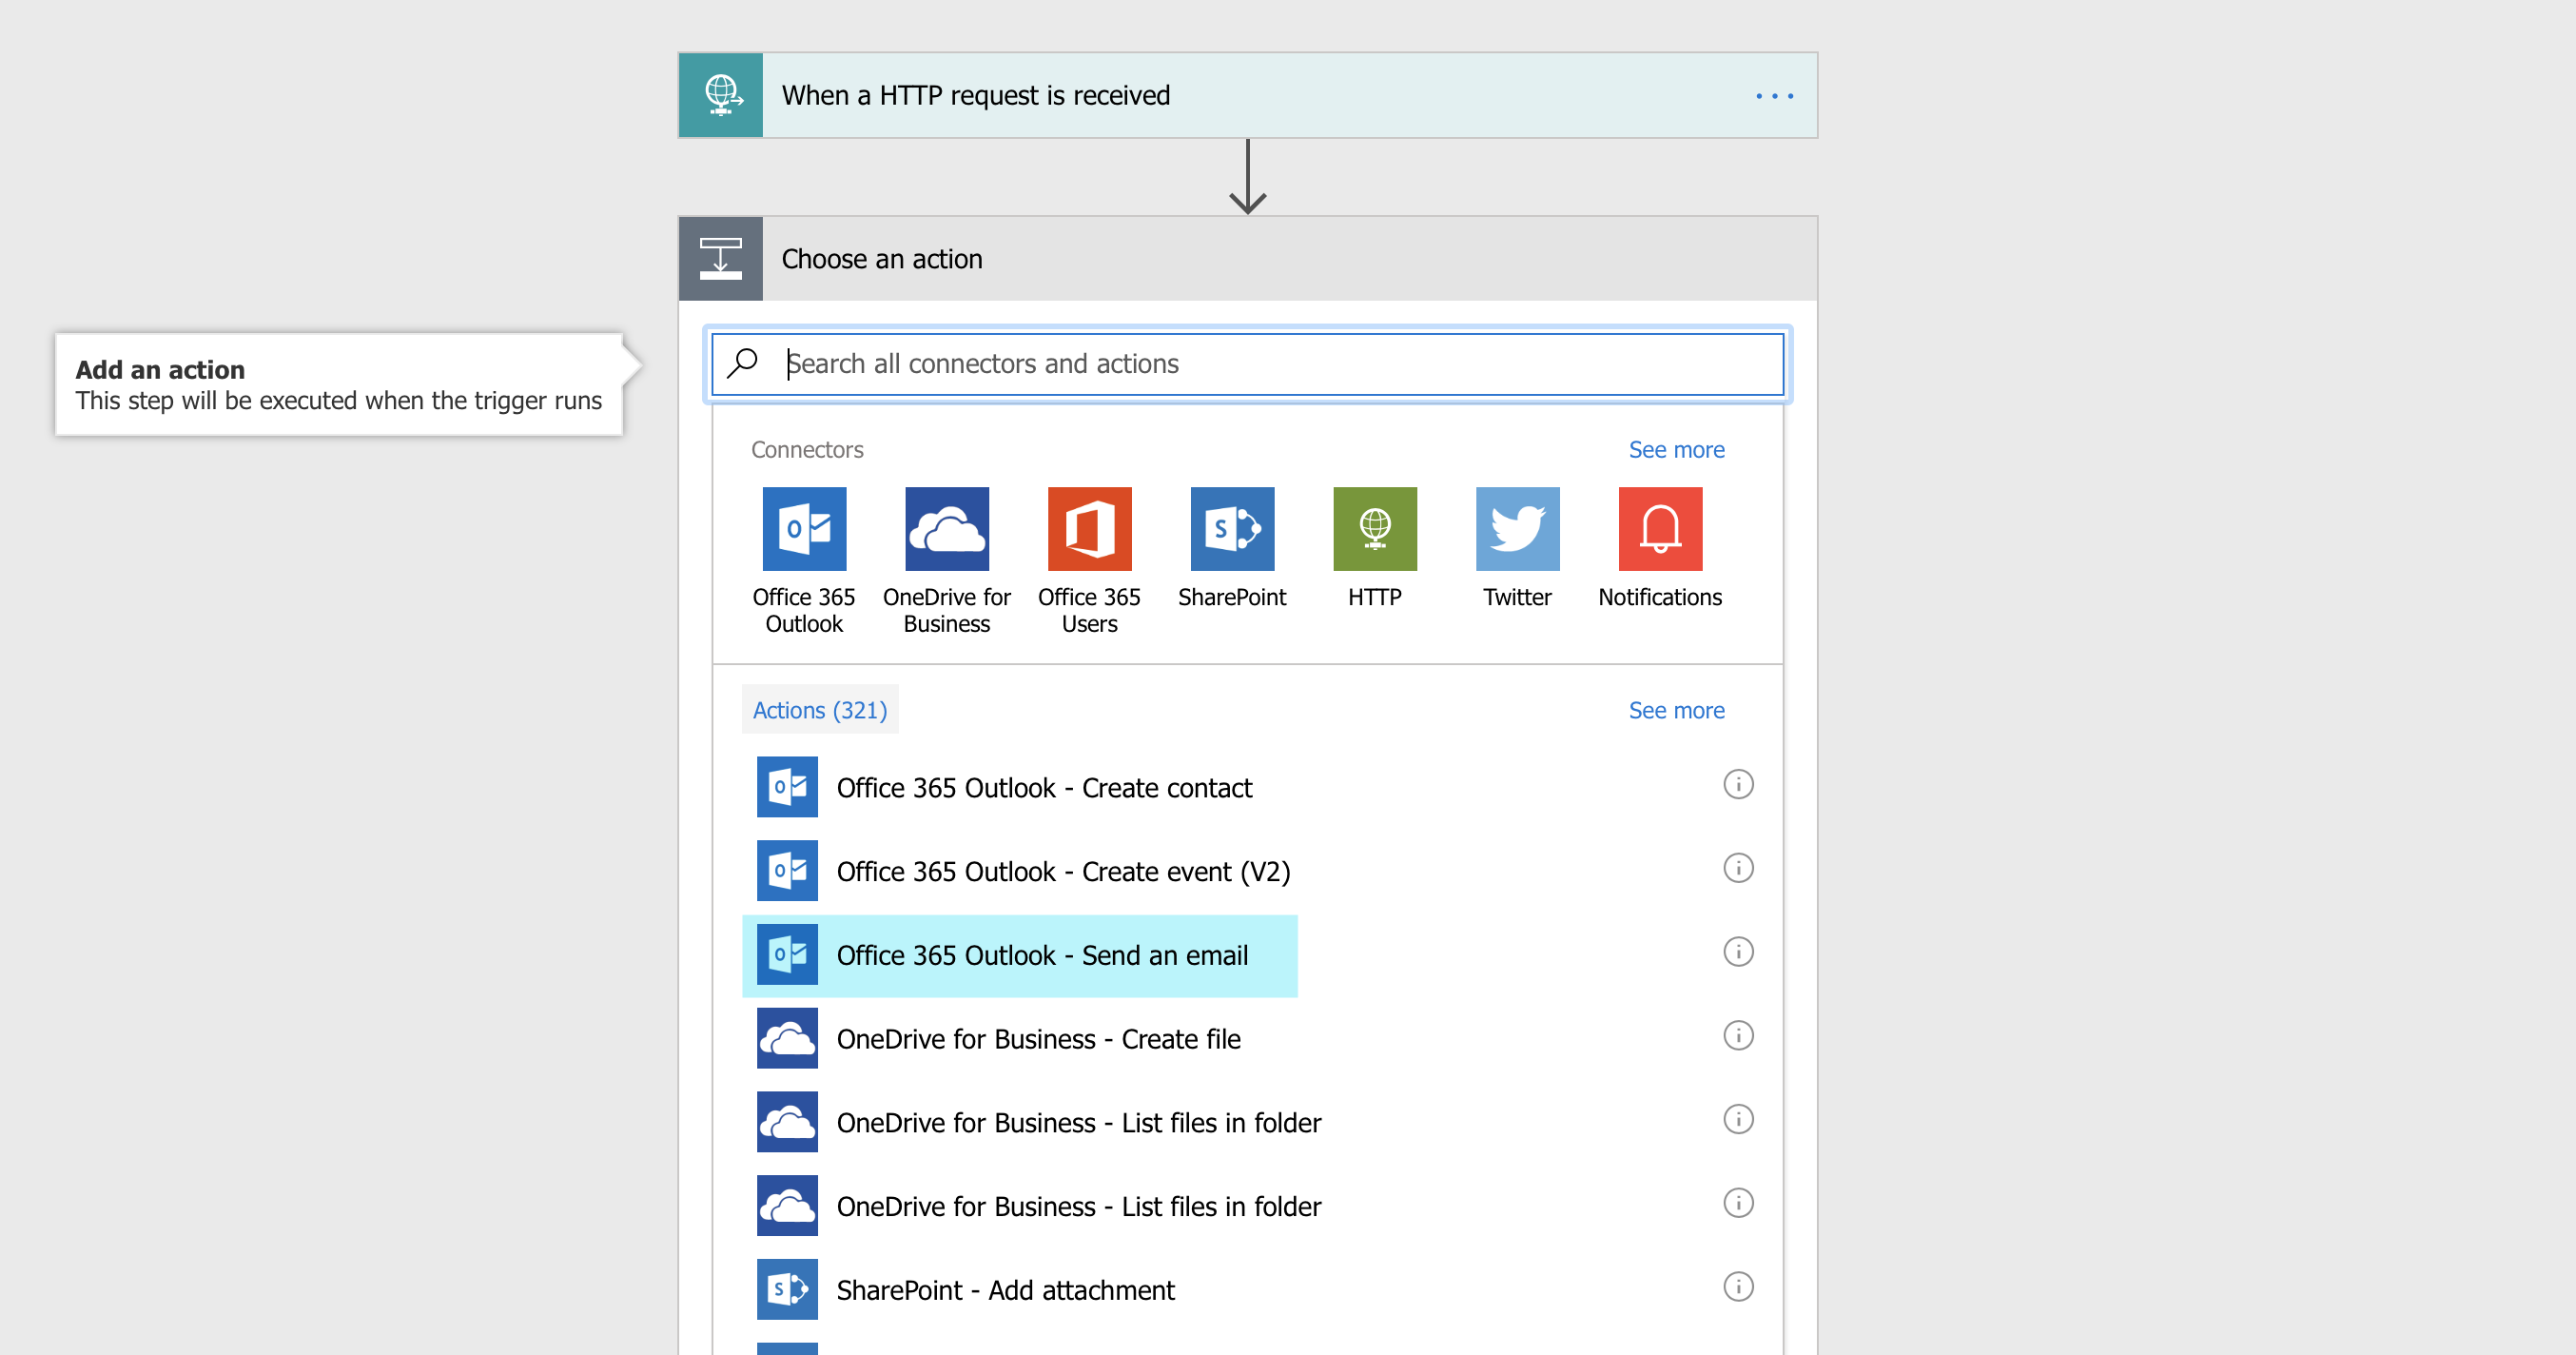
b. Select Office 365 Outlook — Send an email from the Actions list.
5. Name and save your new Microsoft flow.
Configure the To, Subject, and Body fields to work with your specific use case. The Dynamic Content browser on the right side of the Send an email page will allow you to select the dynamic content from the JSON request that Flowroute will be sending to your Microsoft 365 email.
a. Inbound SMS to Email
The following screens show you an example configuration for the Flowroute inbound SMS to Microsoft 365 email setup.
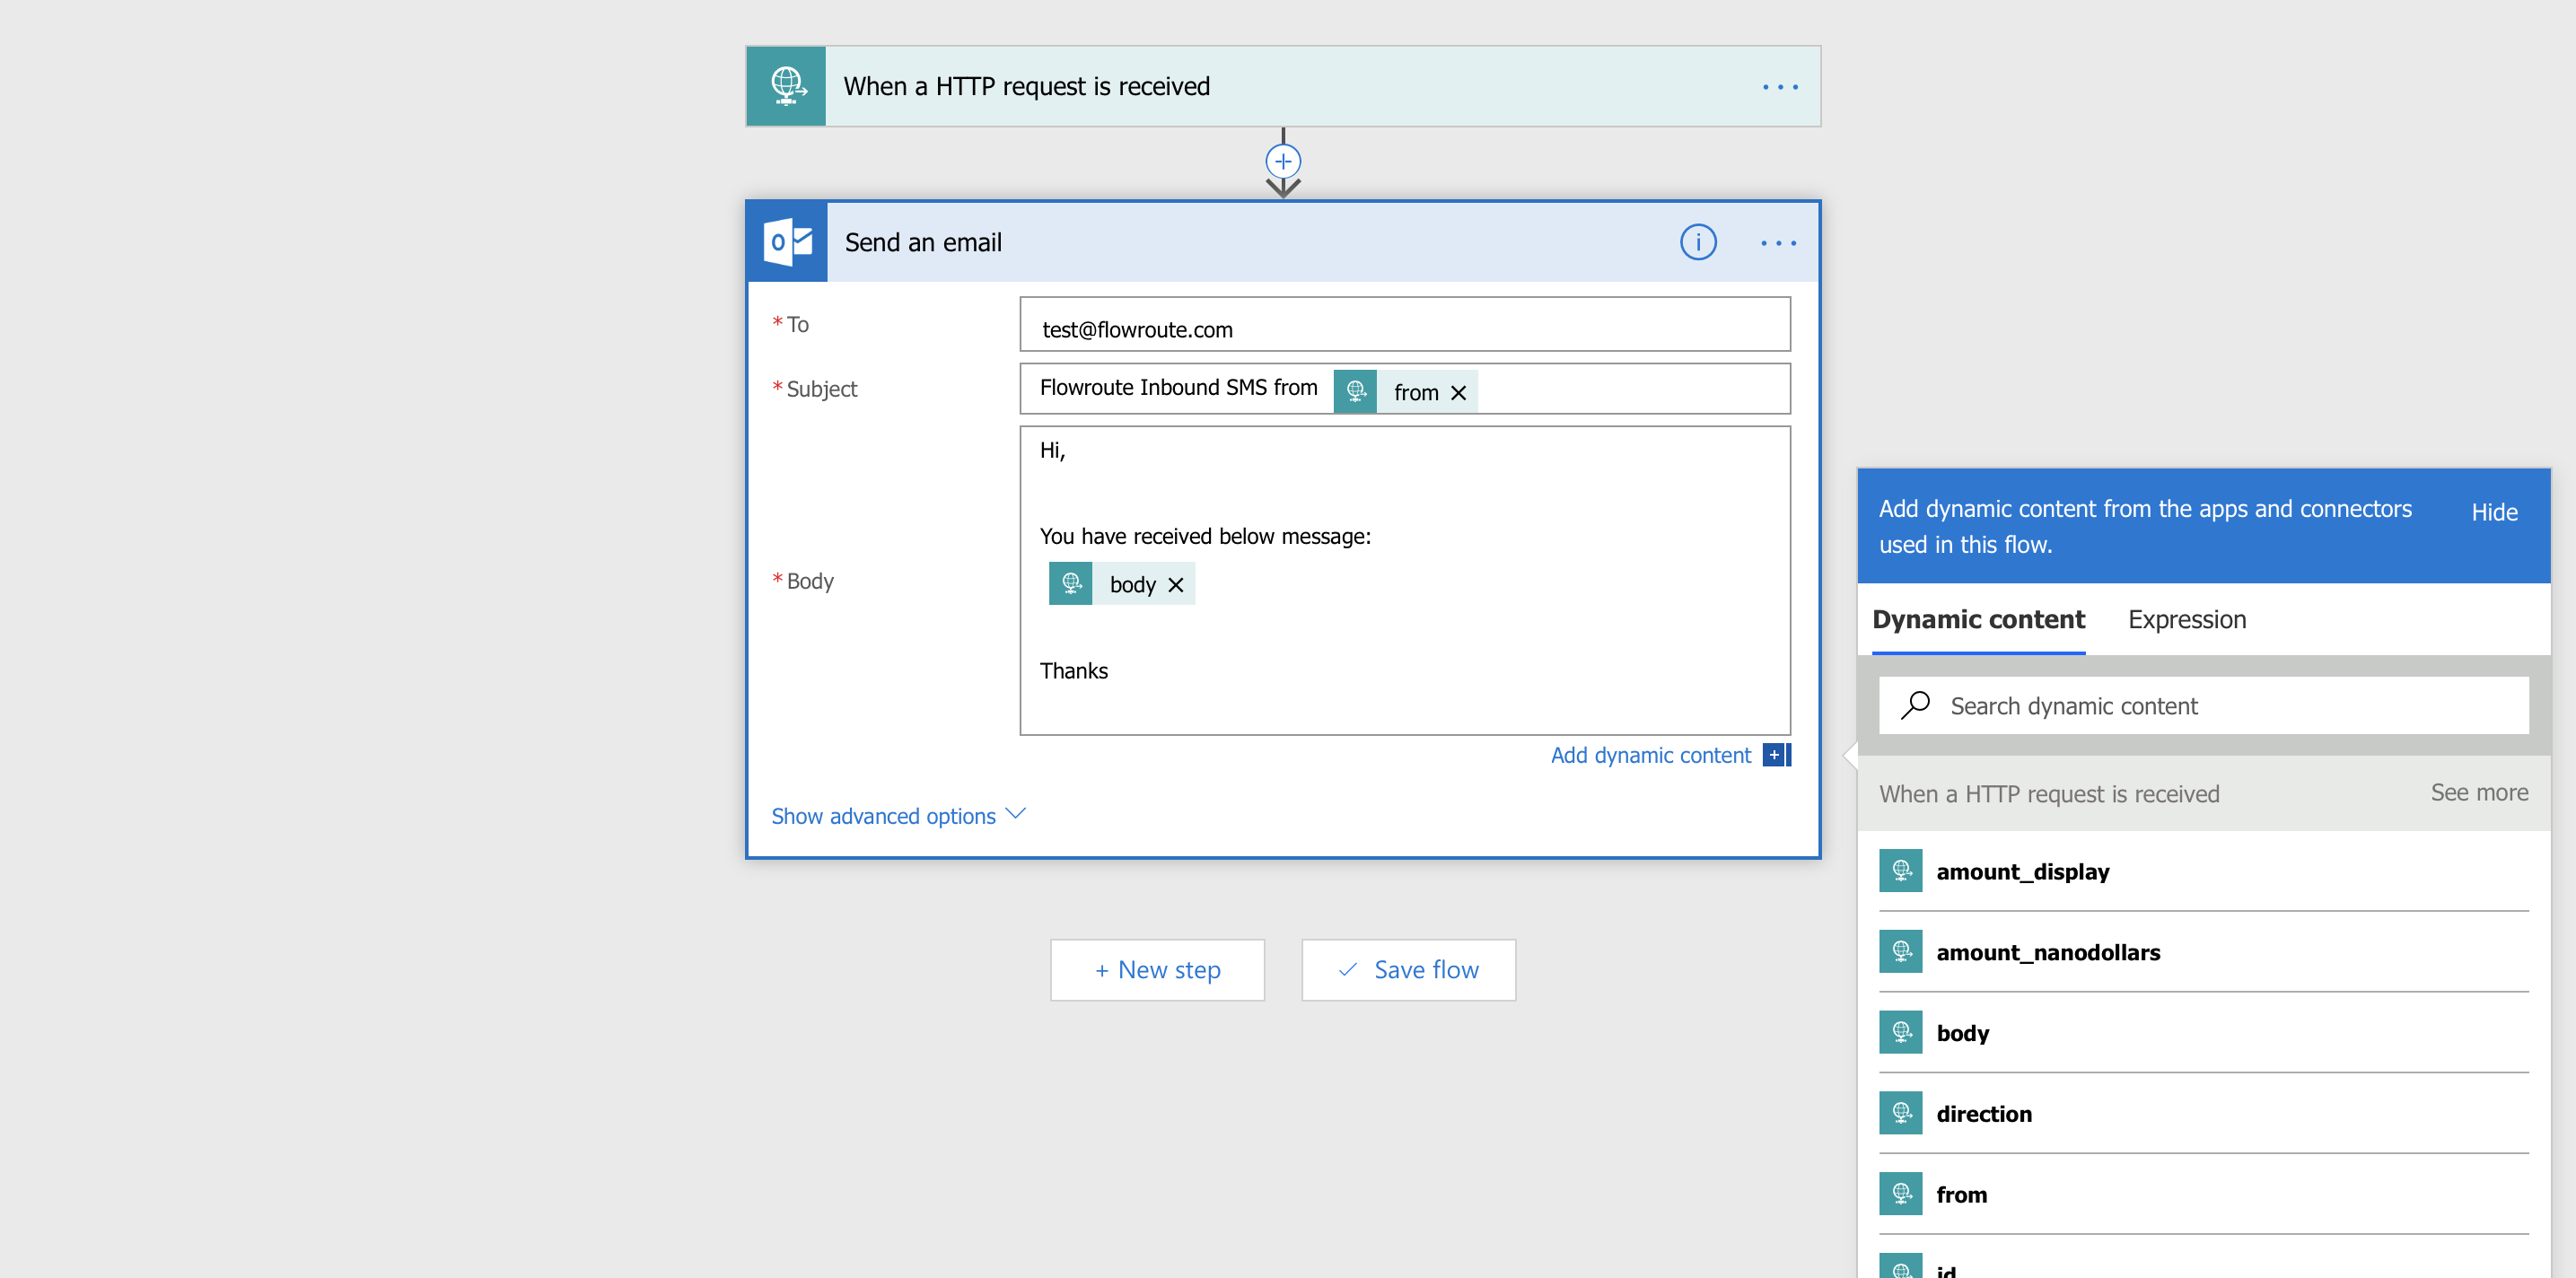 Note the from JSON attribute in the Subject field and the body in the email Body field.
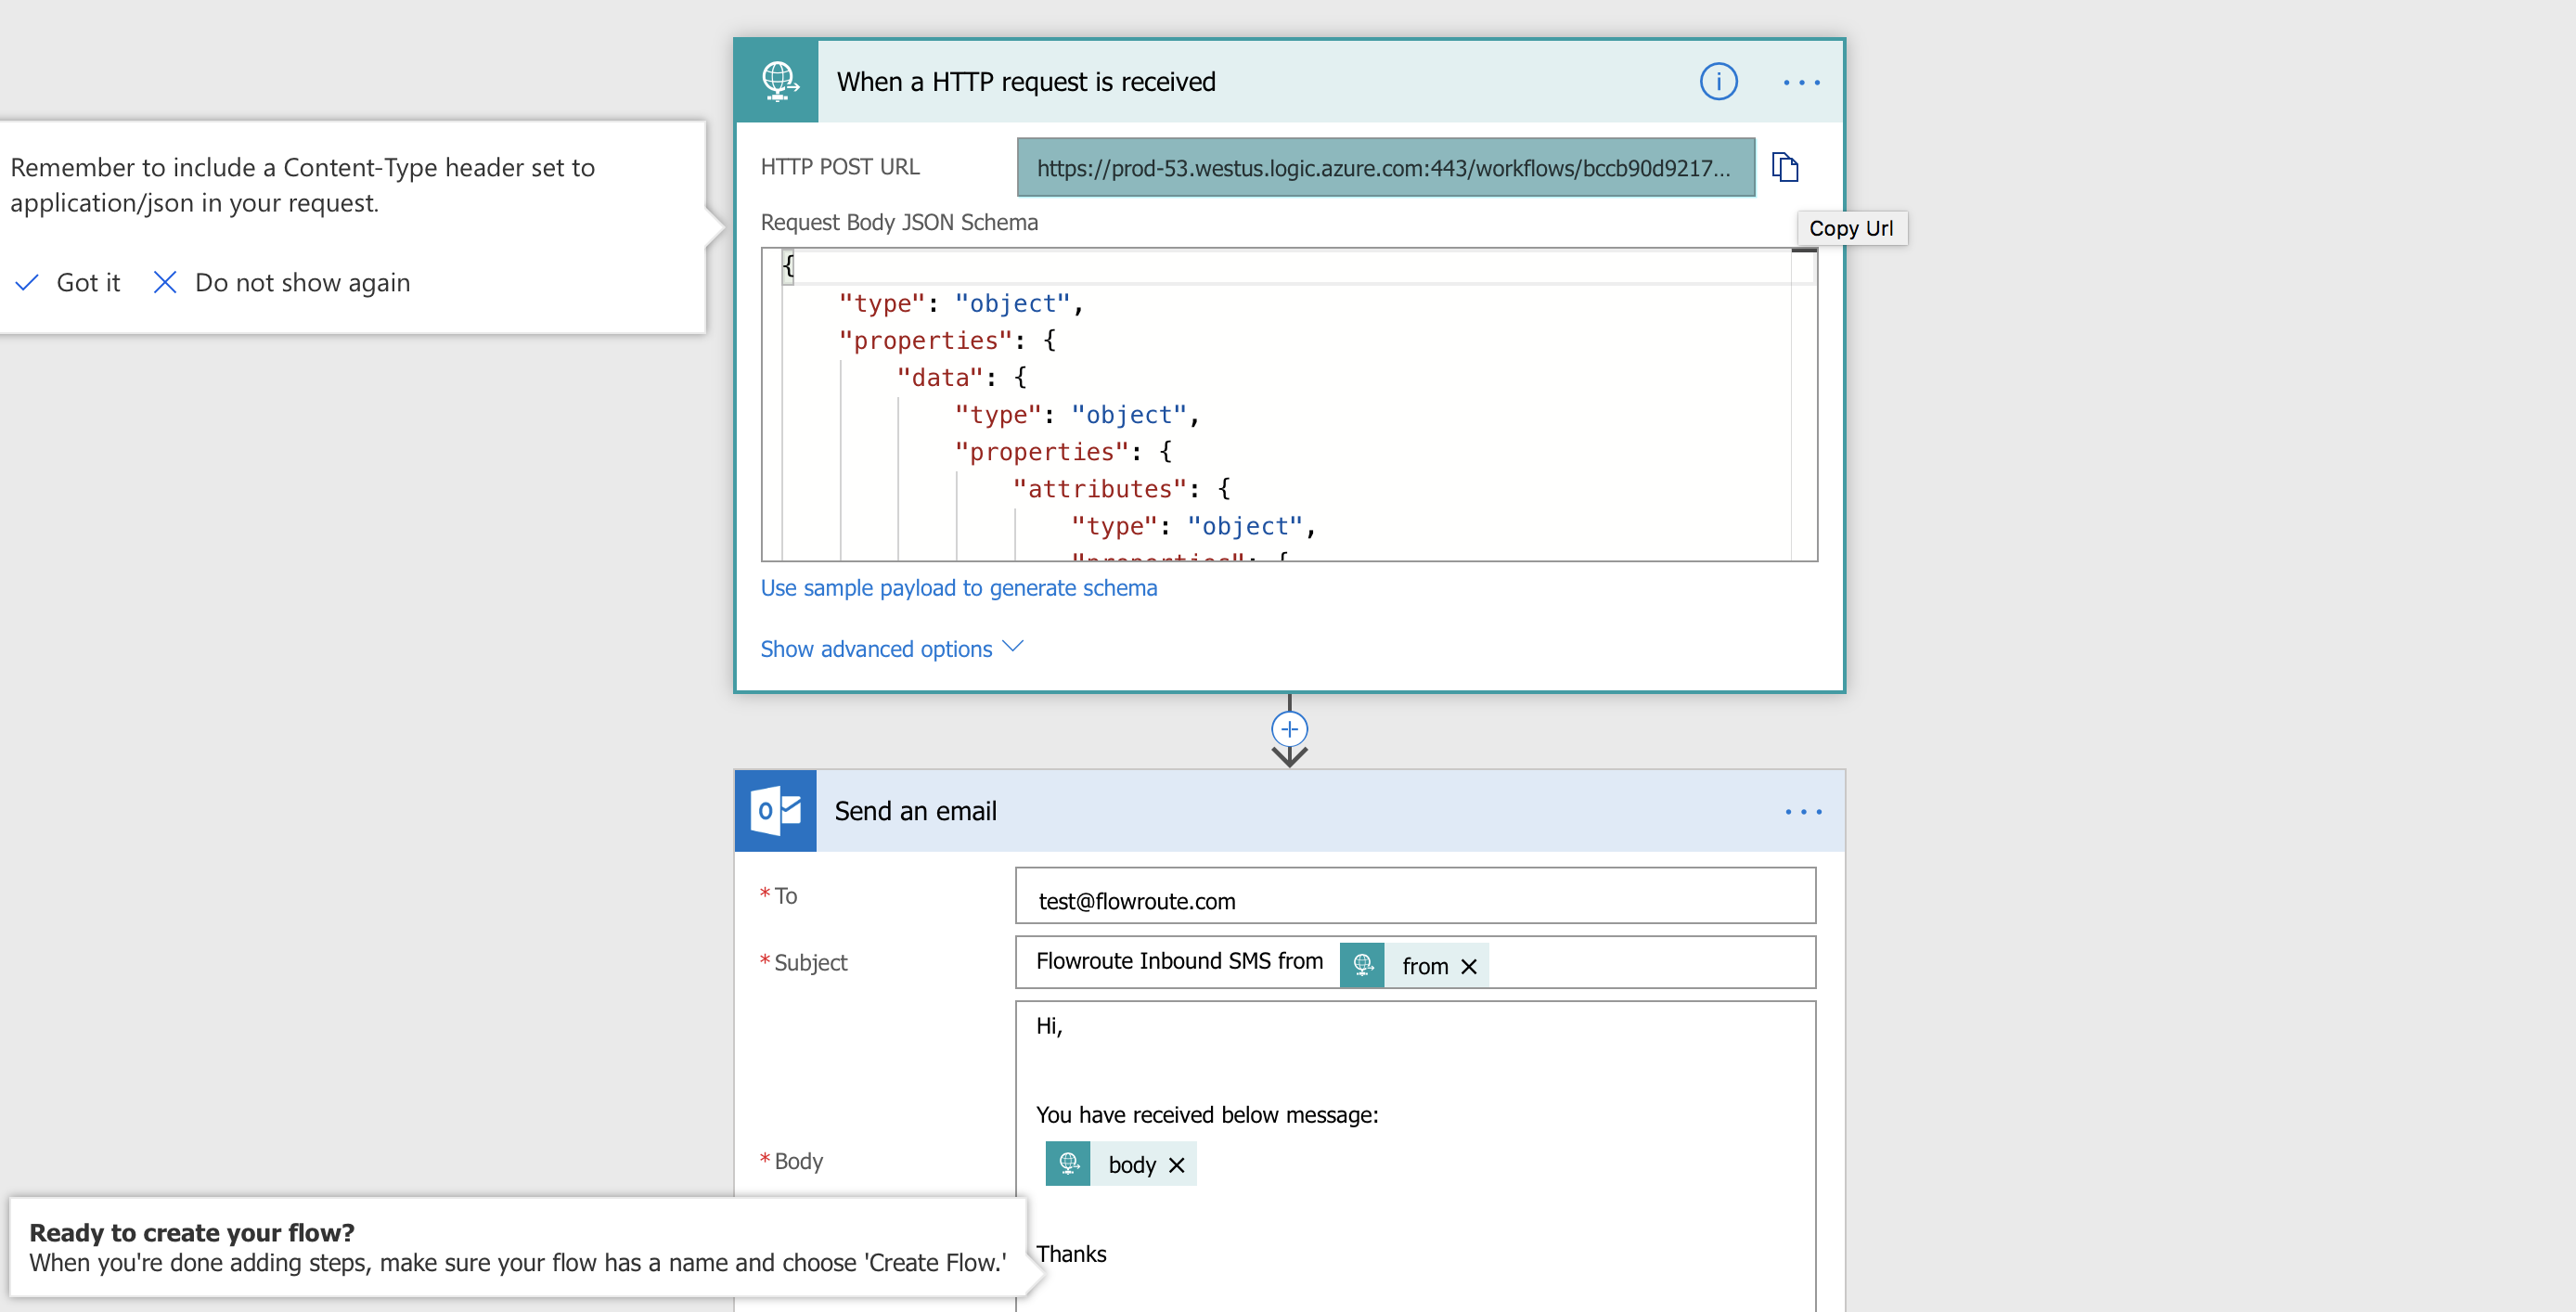 Note the HTTP POST URL that you will need to copy and paste into the Flowroute Manage portal.
b. Inbound MMS to Email
The following screen shows you an example configuration for the Flowroute inbound MMS to Microsoft 365 email setup.

- Enclose the url JSON attribute in the email Body field in an HTML img tag if you want to embed the media attachment from the MMS message into the resulting email notification.
- Select "Yes" from the Is HTML drop-down list to send the email in HTML format.
- Similarly, make a note of the HTTP POST URL for the corresponding Flowroute Manage portal update.
6. Update your Flowroute API preferences.
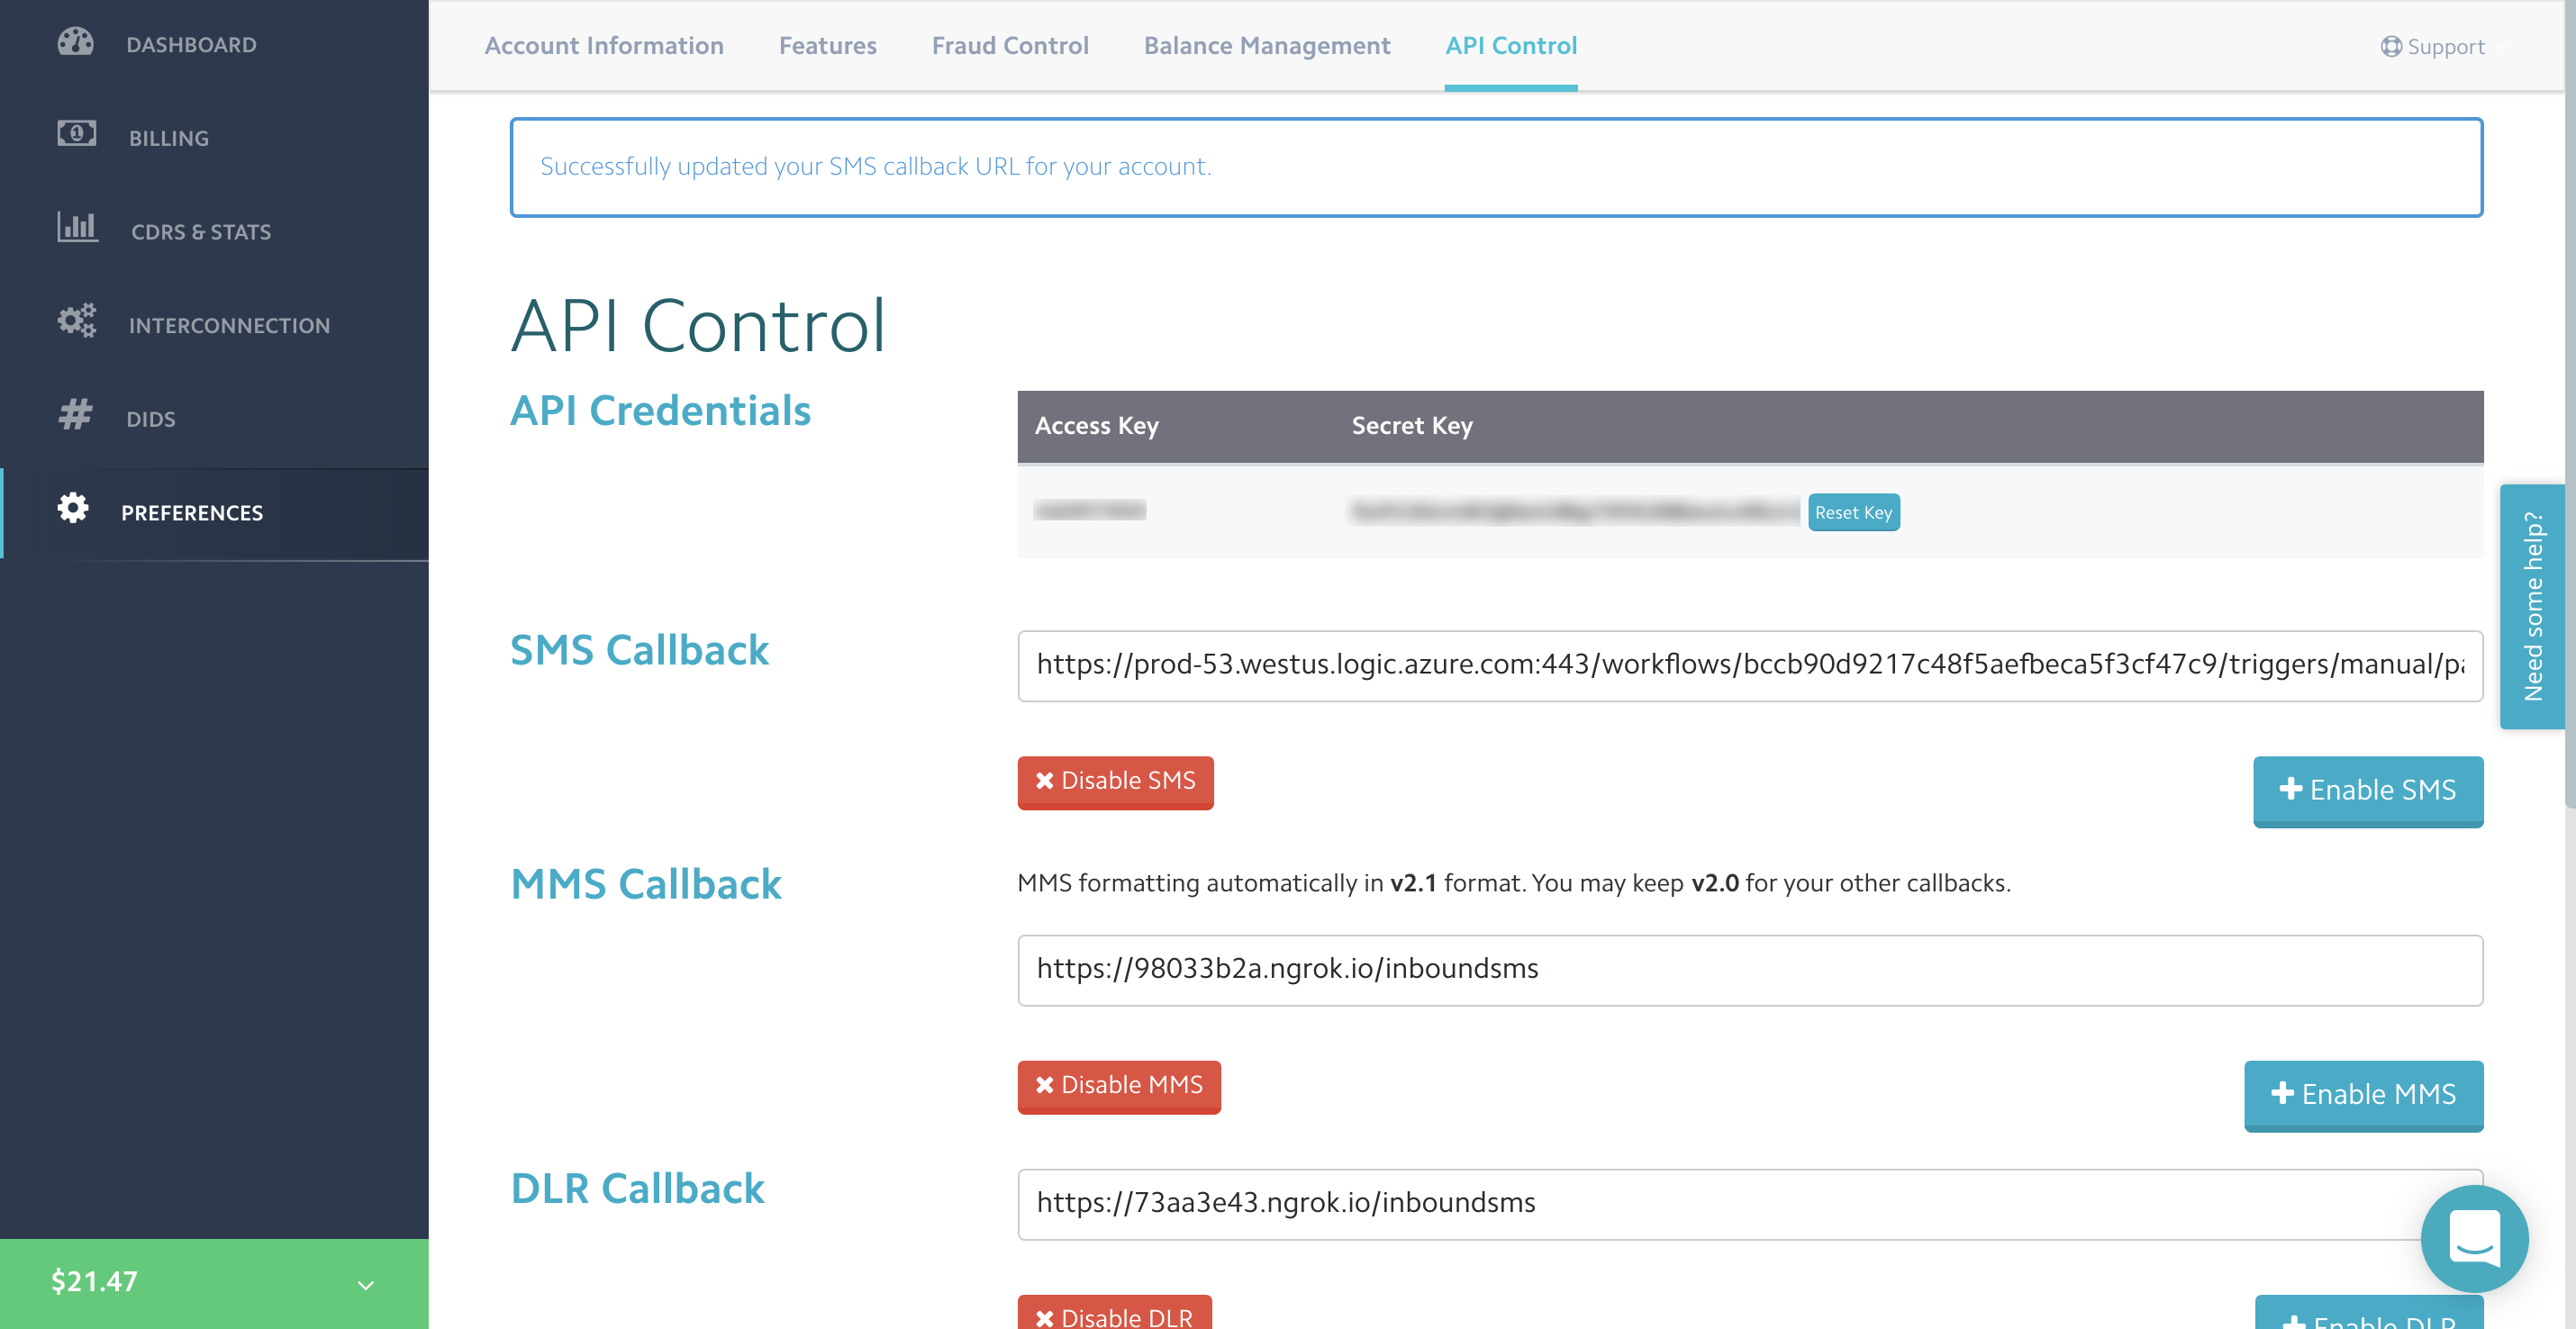
Go to Preferences > API Control tab of the Flowroute Manage portal.
- For your inbound SMS Microsoft flow, replace the SMS Callback field with the HTTP POST URL that you have previously copied.
- If you're configuring an inbound MMS Microsoft flow, replace the MMS Callback field with the HTTP POST URL.
With the Flowroute API and Microsoft 365 connection properly established, you should start receiving details of your inbound SMS or MMS on your Microsoft 365 email.
7. PowerShell function to address API authentication issues
Our awesome contributor, Dan Dickson, reached out to us and added a PowerShell function to help you authenticate with the Flowroute API. See FlowrouteSMS repo for more details.